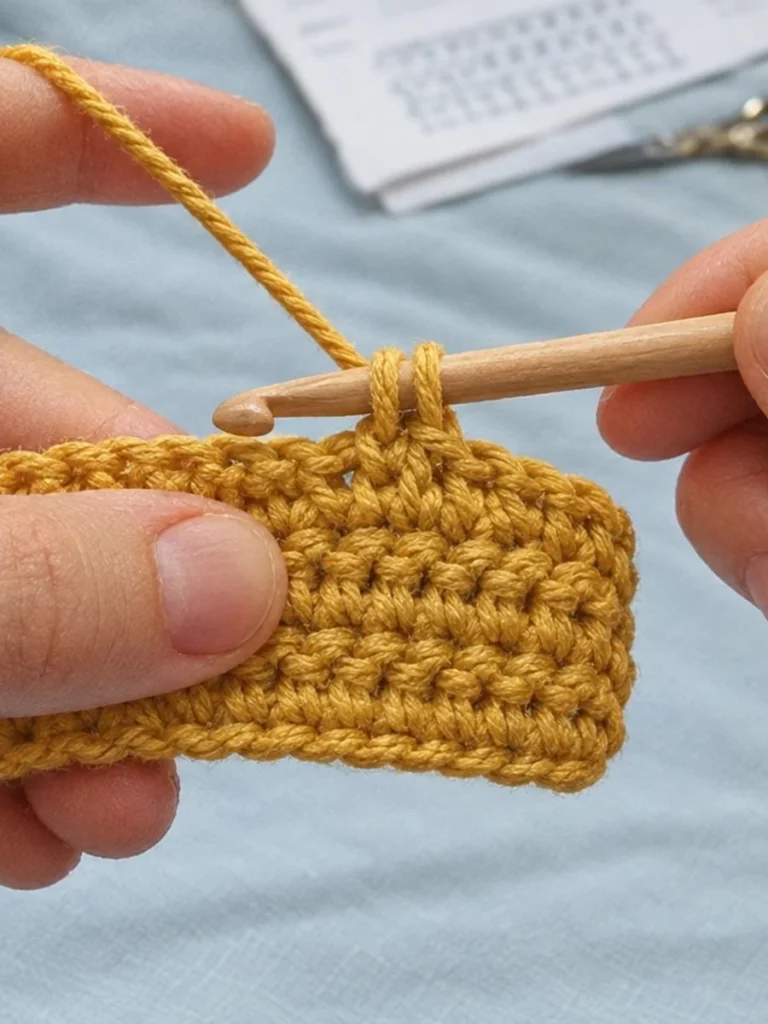
If you have ever made an amigurumi toy or a hat from the top down and ended up with a little hole in the center, the magic ring is the fix. It is an adjustable loop that you crochet your first round into and then pull tight, so the center closes completely. It takes a few tries to get the hand movements down, but once it clicks you will use it for every project worked in the round.
In this post
What a magic ring is and when to use it
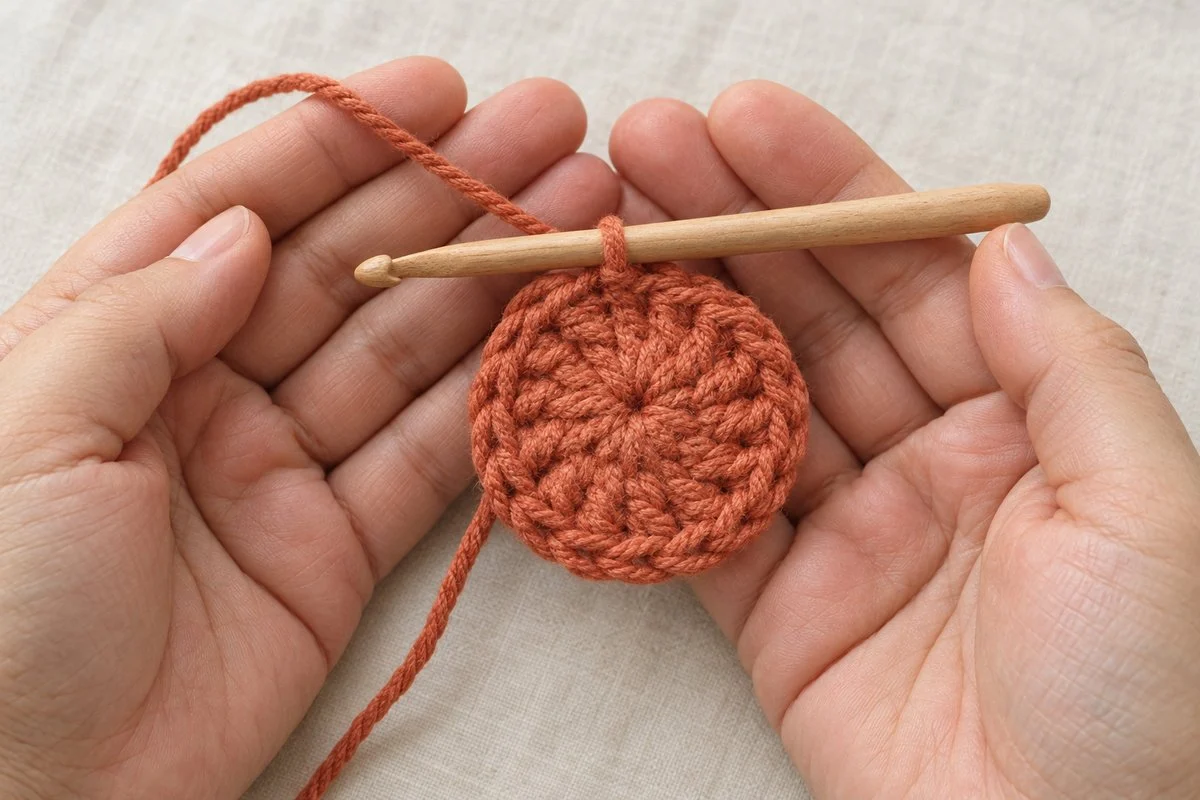
A magic ring (also called a magic circle, magic loop or adjustable ring, and abbreviated MR or MC in patterns) is a way to start crochet in the round. Instead of chaining a few stitches and joining them into a small fixed ring, you wrap the yarn into a loose loop, work your first round of stitches over that loop, and then pull the yarn tail to cinch the loop closed. Because the center can be tightened after the stitches are in place, there is no hole.
Use a magic ring whenever a pattern starts “in the round” and you want a closed center:
- Amigurumi heads, bodies and limbs, where stuffing would otherwise peek through
- Top-down hats and beanies
- Round coasters, baskets and bag bases
- Flowers, circles and the centers of some granny squares
You do not need a magic ring for doilies and lace motifs that are meant to have an open center, or for projects where the pattern tells you to “ch 4, join with sl st to form a ring” and the hole is part of the design.
Yarn and hook for practicing
Learn the magic ring with a smooth, light-colored yarn in a medium (worsted / aran) weight. Cotton or a plain acrylic is ideal because the strands are easy to see and do not split. Pair it with the hook recommended on the yarn label, usually a US H-8 (5 mm) or I-9 (5.5 mm). A hook with a slightly pointed head and a defined throat makes it easier to catch the strand under the loop.
Avoid fuzzy, dark or very slippery yarn for your first few rings. Mohair and chenille hide the strands, and slick yarns can let the ring slide apart before you lock it. Once the movement is in your hands, you can make a magic ring in anything.
How to crochet a magic ring, step by step
These directions are written for a right-handed crocheter who holds the yarn in the left hand. If you crochet left-handed, swap the hands. We will finish the ring with six single crochet (UK: double crochet), which is the most common start for amigurumi.
Step 1: Hold the yarn tail in your palm
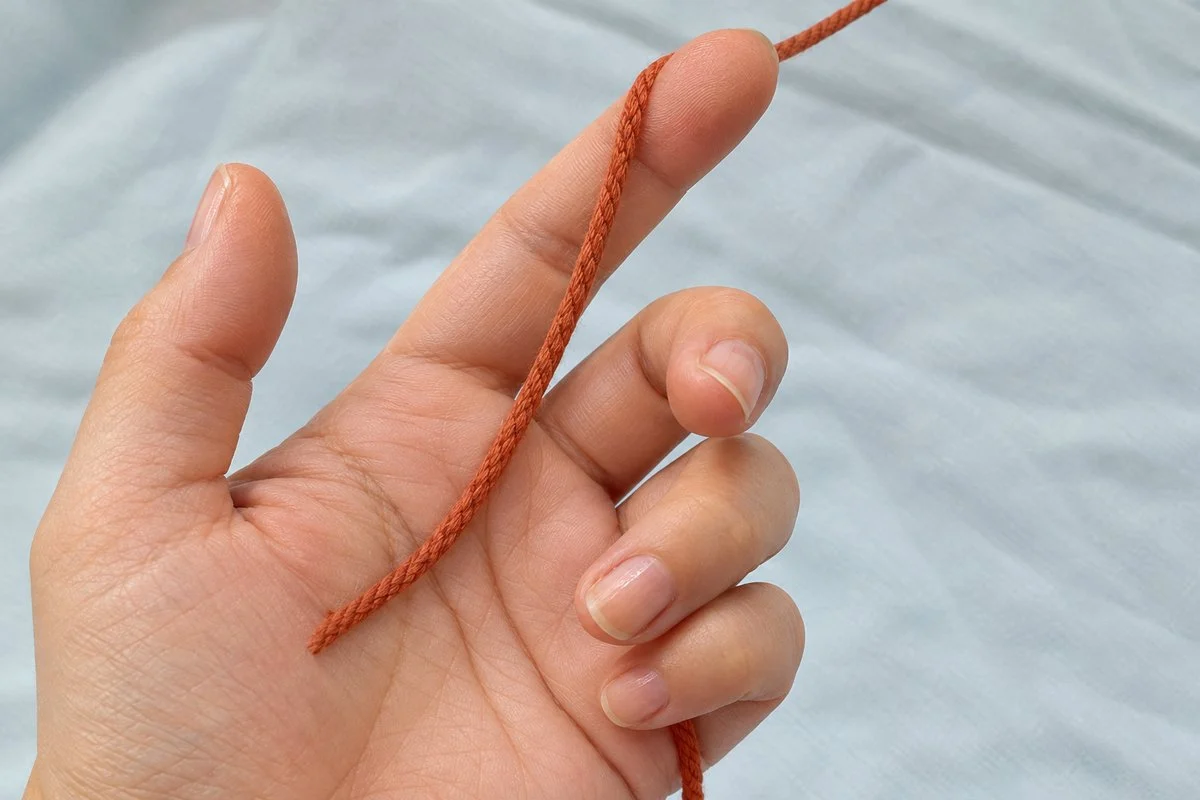
Pull about 6 inches (15 cm) of yarn from the skein. Turn your left palm up and lay the yarn across it so the short tail hangs off the pinky side and the working yarn (the strand attached to the skein) comes from the thumb side. Hold the tail against your palm with your ring finger and pinky. Keep the tail long; a tail that is too short is the most common reason a ring is hard to close.
Step 2: Wrap the yarn twice around two fingers
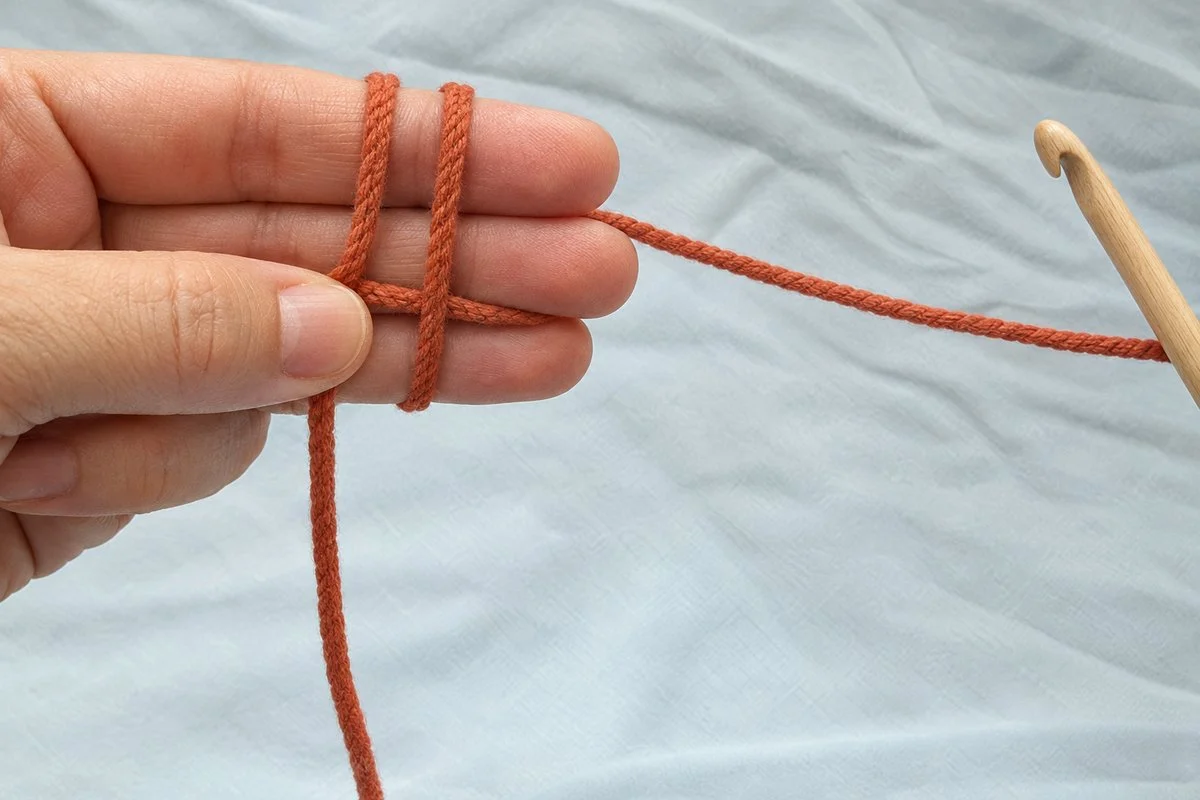
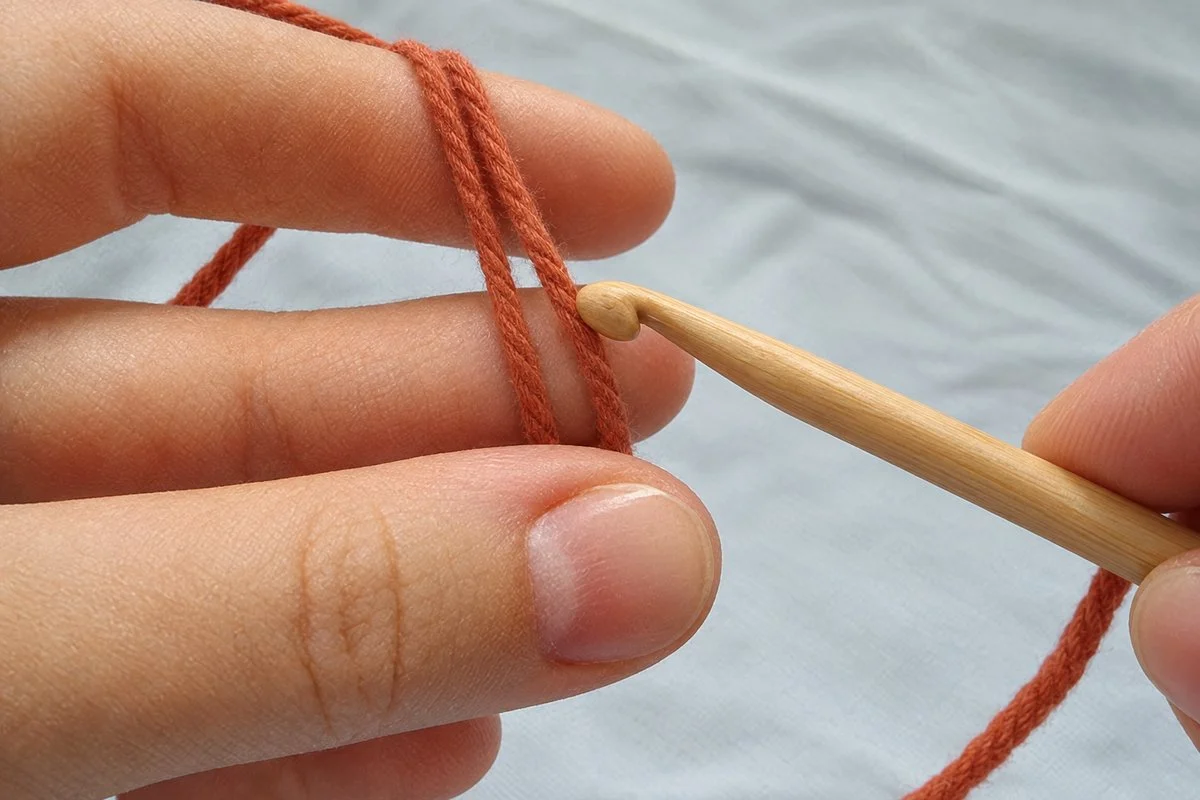
Bring the working yarn up and over your index and middle fingers, around the back and over the front again, so it wraps around both fingers twice. You should now see two parallel strands crossing the front of your fingers, with the working yarn ending up behind them. Pinch the point where the strands cross with your thumb so nothing shifts. Some people wrap only once; wrapping twice gives you a loop with a clear “first” and “second” strand, which makes the next step easier to see.
Step 3: Slide the hook under the first strand
With your right hand, slide the hook under the first strand (the one closest to your fingertips), moving from the fingertips toward your palm. Only that one strand should be sitting on the hook. The second strand stays behind it.
Step 4: Catch the second strand and pull it under the first
Turn the hook so its head faces down, hook the second strand, and draw it back under the first strand toward you. You now have one loop on your hook, and the ring of yarn is still resting on your two fingers. Do not pull hard here; you just want a loop that sits comfortably on the hook.
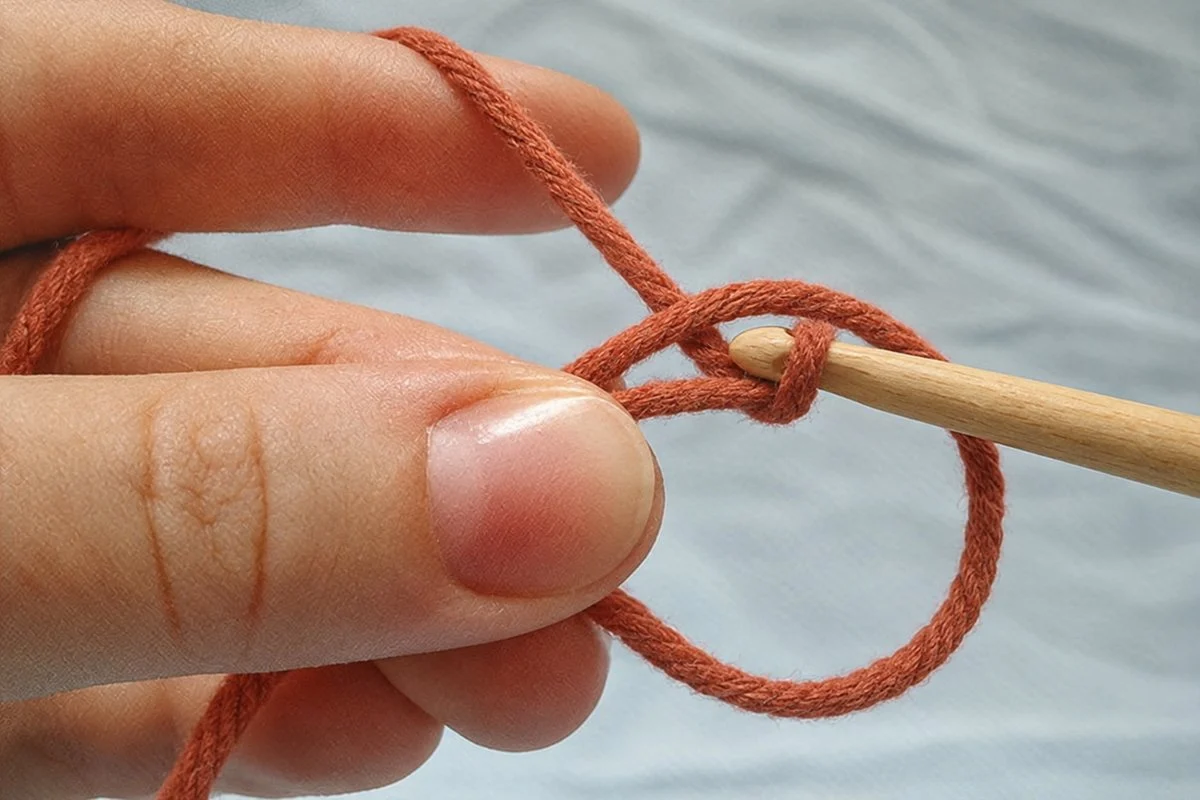
Step 5: Chain 1 to lock the ring
Yarn over with the working yarn and pull it through the loop on your hook. That is one chain stitch, and it locks the ring so it cannot unravel. This chain does not count as a stitch. If your pattern starts with half double crochet or double crochet instead of single crochet, chain 2 or 3 here as the pattern directs.
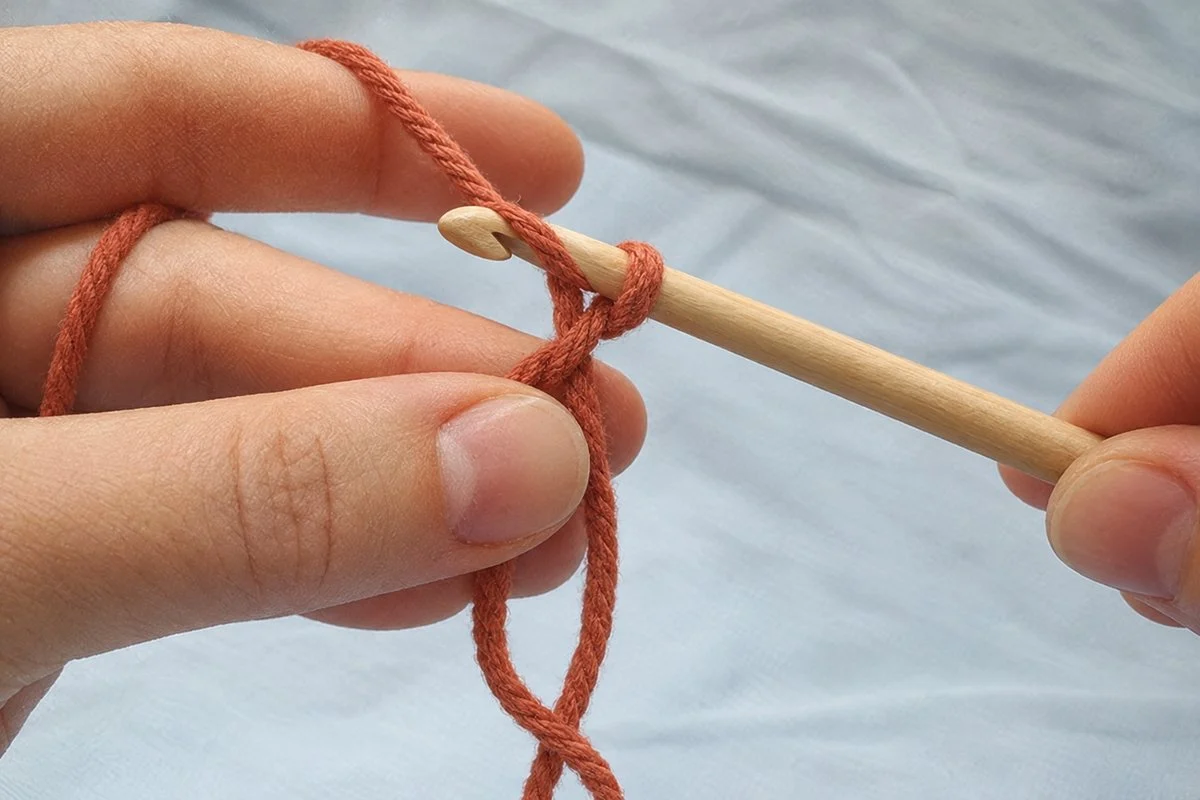
Step 6: Slip the ring off and work the first single crochet into it
Gently slide the ring off your fingers. You will have a loose loop of yarn with the chain sitting at its edge; hold the crossing point between your left thumb and index finger. Insert the hook into the center of the ring, going over both the ring strand and the yarn tail, which should lie alongside it. Yarn over, pull up a loop (two loops on the hook), yarn over, and pull through both loops. That is your first single crochet, worked over the ring and the tail together.
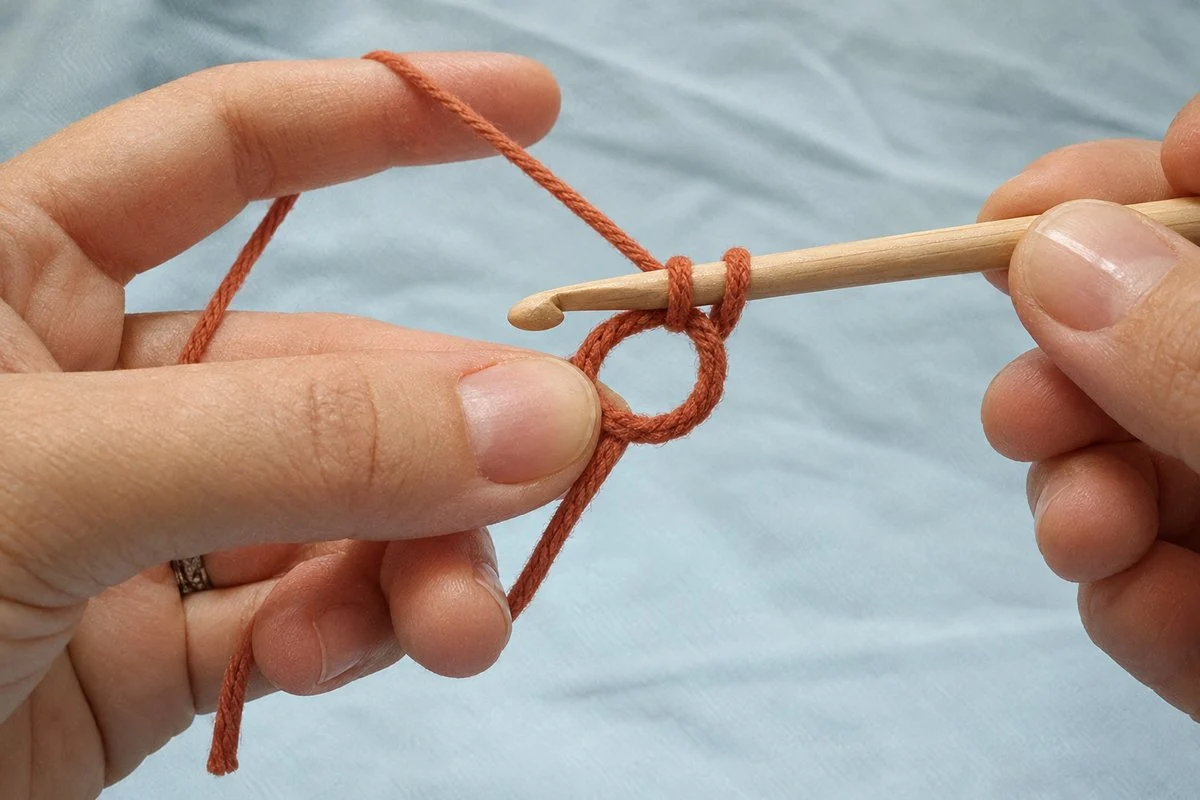
Step 7: Work the rest of the stitches into the ring
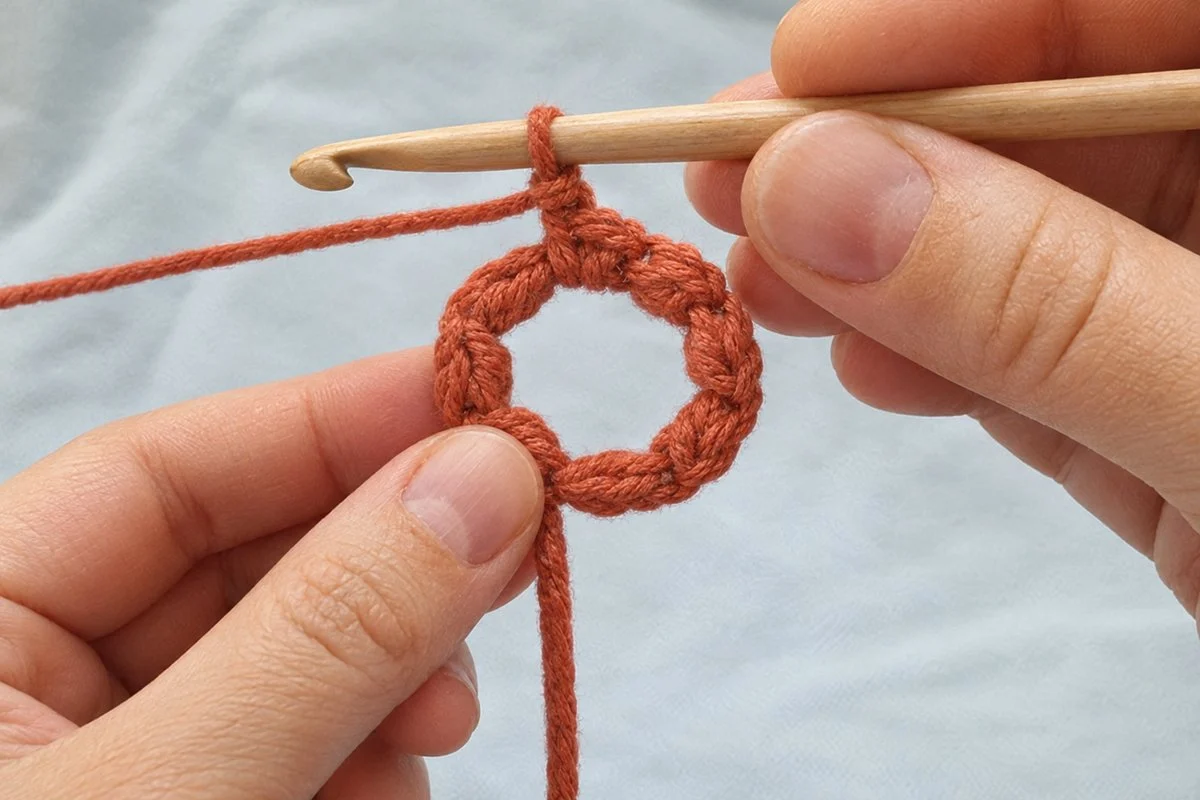
Make five more single crochet the same way, for six in total. Keep the tail running along the ring so every stitch wraps around both strands; this is what makes the ring secure. The stitches will bunch up and the ring will look floppy. That is normal. Count your stitches before moving on, because six is a hard number to check after the ring is closed.
Step 8: Pull the tail to close the ring
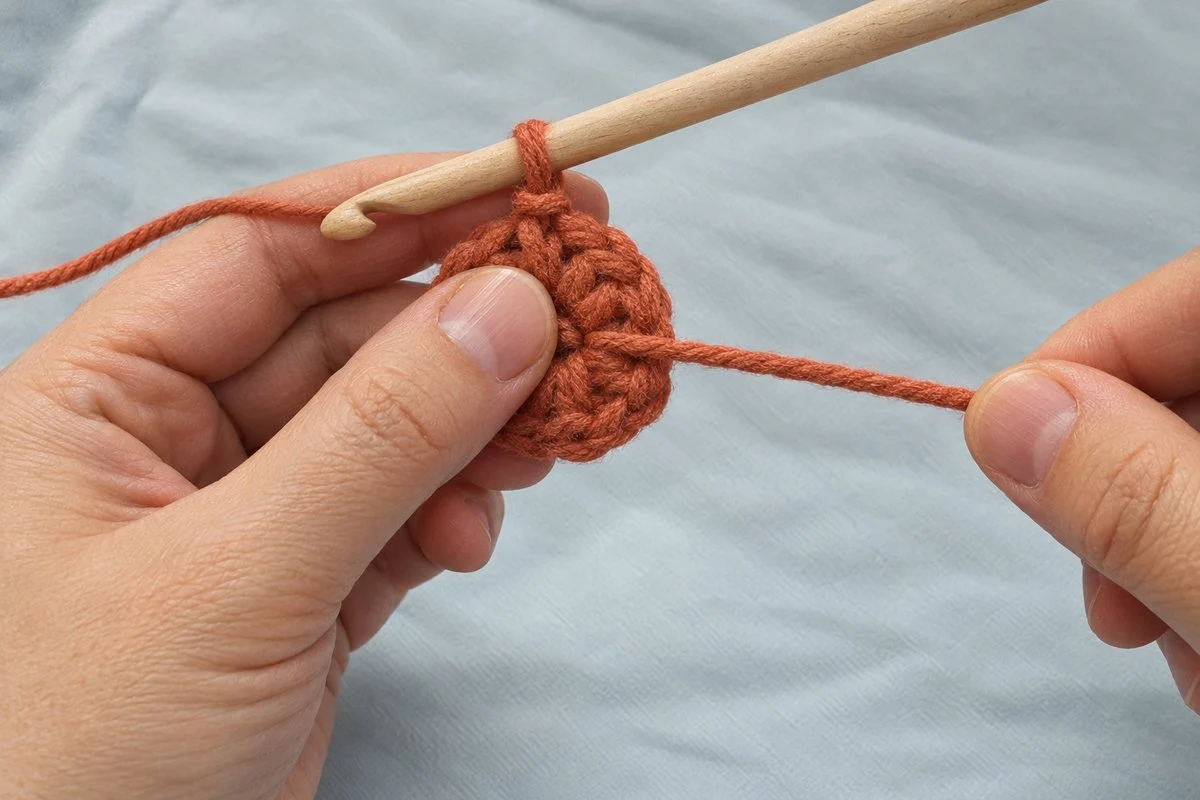
Hold the stitches in your left hand and pull the yarn tail firmly with your right. The center of the ring will draw closed and the six stitches will arrange themselves into a tight little circle. If you wrapped the yarn twice in Step 2, you may notice that pulling the tail closes one loop but a second, inner loop remains. Find that remaining loop in the center, give it a tug to pull it snug, then pull the tail once more to finish closing. Keep pulling until there is no visible hole.
Step 9: Continue your pattern
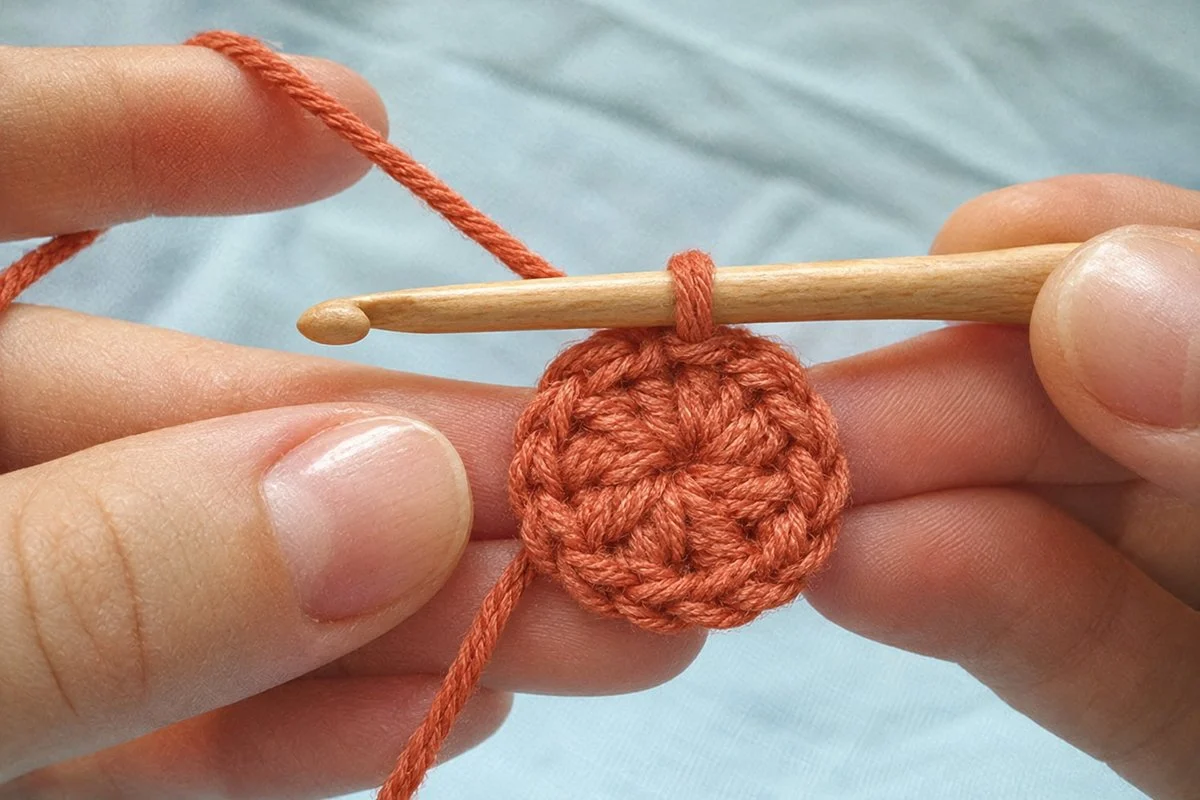
Your magic ring is finished. Most amigurumi patterns continue straight into round 2 in a spiral, with a stitch marker in the first stitch. Other patterns ask you to join with a slip stitch to the first single crochet before starting the next round. Either way, leave the tail alone for now; you will weave it in at the end, and it also lets you re-tighten the center if it loosens while you work.
How to keep the ring closed for good
A magic ring that was tight when you made it can creep open as the piece is handled, especially in slippery yarn or on a toy that gets a lot of play. These habits keep it closed:
- Work over the tail. Crocheting the first round over both the ring and the tail doubles the friction that holds the ring shut.
- Weave in the tail securely. When the piece is done, thread the tail onto a yarn needle and weave it through the back of the first round in one direction, then back in the opposite direction. For amigurumi, go through a few stitches, change direction, then bury the end inside the stuffing.
- Tie a small knot if you are worried. After weaving in, a tiny overhand knot around a stitch on the wrong side is invisible on a toy and adds insurance.
- Avoid pulling the tail after it is woven in. It will not re-tighten and may distort the center.
Alternatives to the magic ring
If the magic ring will not cooperate, you can still start in the round. The chain-2 method below is the one most crocheters reach for; the classic “ch 4, join with sl st to form a ring” also works but always leaves a small hole.
The chain-2 method
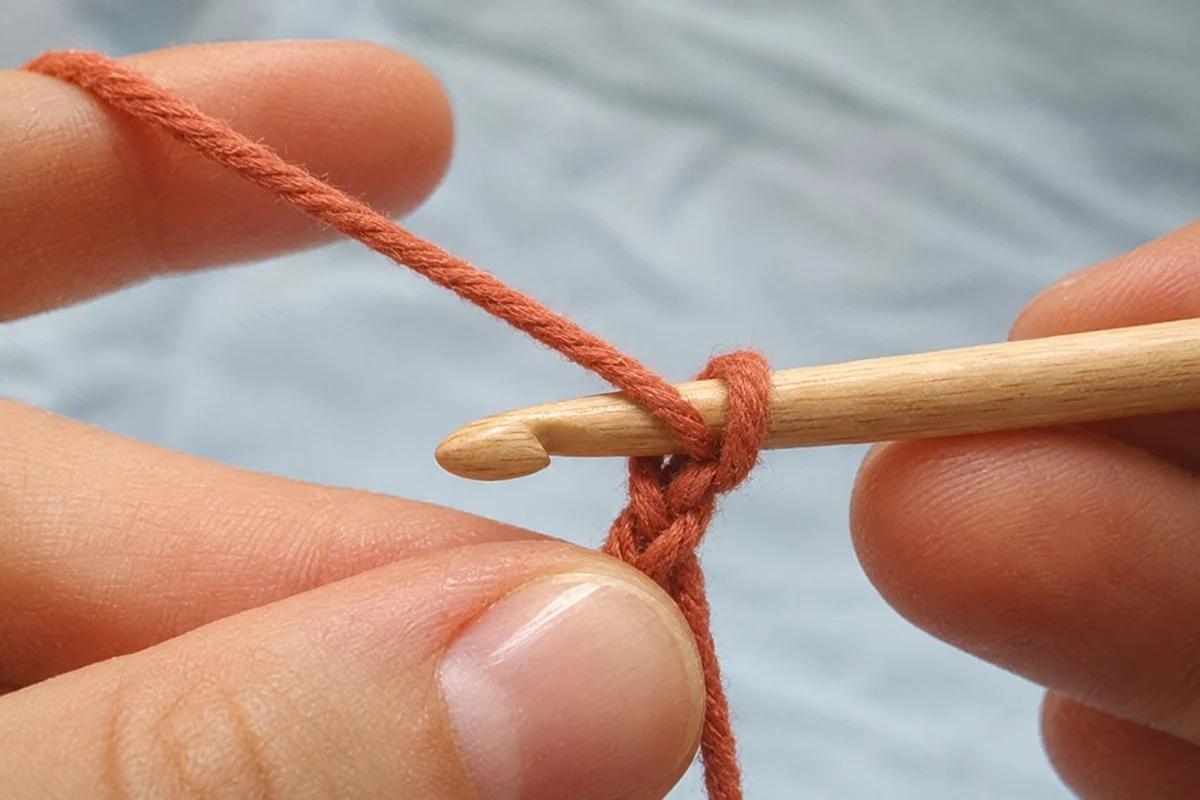
Make a slip knot and chain 2. Insert the hook into the second chain from the hook (the first chain you made, right next to the slip knot) and work all of your first-round stitches into that one chain: six single crochet, for example. Because the stitches crowd into a single chain, the center closes almost as tightly as a magic ring, and you can snug it further by tugging the tail. This method is quick, stable and a good choice for beginners and for yarns that will not hold a magic ring.
Troubleshooting a magic ring that loosens or will not close
- Pulling the tail does nothing. You probably crocheted over the working yarn instead of the tail, or the tail slipped out from under the stitches. Undo the round and make sure the tail lies along the ring as you work.
- The ring closes partway and stops. With a double wrap, there are two loops to close. Pull the tail until it stops, find the remaining loop in the center and tug it, then pull the tail again.
- The ring unravels when you slide it off your fingers. You skipped the locking chain in Step 5, or the hook went over the second strand instead of under the first. Start again and watch the yarn path in Steps 3 and 4.
- The center opens up again later. The tail was woven in too loosely or too short. Next time leave a longer tail, weave it in two directions and tie a small knot on the wrong side.
- The first round looks lopsided. Your stitches were different sizes, or some were worked over the tail and some not. Consistency comes with practice; make a few rings in a row and compare them.
Frequently asked questions
How many stitches go into a magic ring?
Whatever your pattern says. Six single crochet is the standard start for amigurumi spheres, 8 or 10 for a hat crown worked in half double or double crochet, and 12 double crochet for flat circles and the center of some squares.
Is a magic ring the same as a magic circle?
Yes. Magic ring, magic circle, magic loop and adjustable ring all describe the same technique. Patterns abbreviate it MR, MC or sometimes “adjustable loop”.
Can I make a magic ring left-handed?
Absolutely. Hold the yarn in your right hand and the hook in your left, and follow the same steps in mirror image. If photos are hard to follow, try holding a mirror beside them.
Why does my magic ring have a hole in it?
Either it was not pulled fully closed (check for a second inner loop if you double-wrapped), or the tail has worked loose. Pull the tail again before weaving it in, and weave the end in two directions.
Do I need a magic ring for a hat?
Not strictly, but it gives the neatest crown. The chain-2 method is a good alternative for hats, and the hole from a chain-4 ring can be closed afterward with the yarn tail if you do not mind a little fussing.
Keep learning
Now that you can start in the round, the next skill is following the rounds that come after it. Our guide on how to read crochet patterns explains abbreviations, stitch counts, repeats and gauge in plain English, with a sample pattern worked line by line.