Description
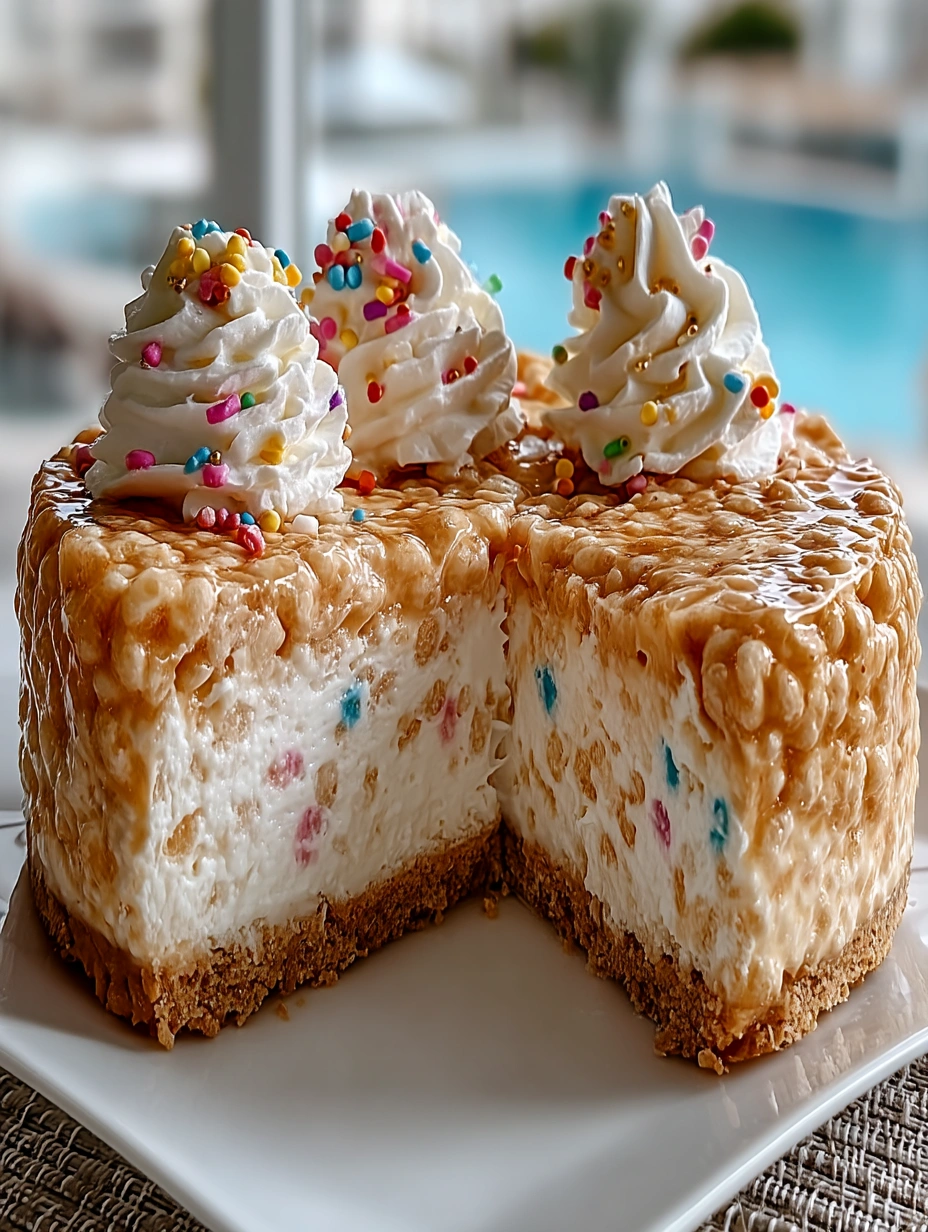
This Rice Krispie Treat Cheesecake is a fun mashup of chewy marshmallow cereal bars and creamy no-bake cheesecake, perfect when you want food ideas that feel playful but still special. It’s an easy recipe that’s ideal for quick breakfast treats, after-dinner desserts, or party snacks, and it fits right in with your favorite breakfast ideas, dinner ideas, and sweet treats for a crowd. With a no-bake cheesecake layer, simple ingredients, and make-ahead convenience, it’s the kind of easy dinner dessert you can whip up whenever you’re craving something rich, nostalgic, and impressive without much effort or stress.
Ingredients
4 cups Rice Krispies cereal
5 tablespoons unsalted butter
4 cups mini marshmallows
1/4 teaspoon fine sea salt
16 ounces cream cheese softened
2/3 cup powdered sugar
1 teaspoon vanilla extract
1 cup sour cream
1 1/4 cups heavy whipping cream cold
1 1/2 cups Rice Krispies cereal
1 1/2 cups mini marshmallows
2 tablespoons unsalted butter melted
Instructions
1. Line and prep the pan by greasing the sides of a 9-inch springform pan and lining the bottom with a round of parchment paper so the crust releases cleanly after chilling.
2. Melt butter for the crust in a large heavy-bottomed pot over low heat until just melted, making sure it does not brown.
3. Add mini marshmallows to the pot and stir constantly over low heat until the marshmallows are completely melted and the mixture is smooth and glossy.
4. Remove the pot from the heat, sprinkle in the fine sea salt, and immediately add the Rice Krispies cereal, folding gently until all of the cereal is evenly coated in the marshmallow mixture.
5. Transfer the warm cereal mixture into the prepared springform pan and, using lightly buttered hands or a greased spatula, press it firmly and evenly into the bottom to form a level crust, then let it cool to room temperature.
6. Beat the softened cream cheese in a large mixing bowl with a hand mixer or stand mixer until smooth, fluffy, and free of lumps, scraping down the bowl as needed.
7. Add powdered sugar and vanilla extract to the cream cheese and continue beating until the mixture is silky and fully combined.
8. Mix in the sour cream on low speed until just incorporated, keeping the mixture smooth and creamy without over-whipping.
9. In a separate chilled bowl, whip the cold heavy whipping cream to medium-stiff peaks using a hand mixer or whisk, taking care not to overbeat it into butter.
10. Gently fold the whipped cream into the cream cheese mixture in two or three additions, using a spatula and light motions so the filling stays airy and mousse-like.
11. Spoon the cheesecake filling over the cooled Rice Krispie crust, spreading it into an even layer and smoothing the top with an offset spatula while pressing the filling lightly into the edges of the pan.
12. Tap the pan a few times on the counter to release any trapped air bubbles and to help the filling settle into a smooth, level layer.
13. For the topping, stir together the Rice Krispies cereal and mini marshmallows in a medium bowl, then drizzle in the melted butter and toss until everything is lightly coated.
14. Sprinkle the topping mixture evenly over the cheesecake layer, pressing very gently so it adheres without sinking into the filling.
15. Cover the pan tightly with plastic wrap or foil and refrigerate the cheesecake for at least 4 hours, or overnight, until the filling is fully set and firm enough to slice cleanly.
16. When ready to serve, run a thin knife around the inside edge of the pan to loosen the cheesecake, release the springform ring, and cut into 10 to 12 slices, wiping the knife between cuts for neat layers.
Notes
For the cleanest slices, chill the cheesecake overnight and use a sharp knife wiped clean between cuts so the layers stay well defined.
Melt the marshmallows over low heat and avoid overcooking them; this keeps the Rice Krispie crust chewy rather than hard once it cools.
For extra flavor and texture, drizzle slices with caramel or chocolate sauce just before serving, or add a handful of extra Rice Krispies or sprinkles on top for special occasions.
- Prep Time: 25
- Cook Time: 5
- Category: Dessert
- Method: No-Bake
- Cuisine: American
Nutrition
- Serving Size: 1 slice
- Calories: 520
- Sugar: 40
- Sodium: 260
- Fat: 32
- Saturated Fat: 19
- Unsaturated Fat: 11
- Trans Fat: 0
- Carbohydrates: 54
- Fiber: 0
- Protein: 7
- Cholesterol: 105
Keywords: rice krispie cheesecake, rice krispie treat cheesecake, no bake cheesecake, marshmallow dessert, cereal dessert, easy dessert, party dessert, quick breakfast, breakfast ideas, dinner ideas, easy recipe, food ideas