


Bright, buttery, and beautifully pink, these Raspberry Lemonade Bars taste like sunshine tucked into a soft dessert square. They have a tender shortbread crust, a fresh lemon filling, and a sweet raspberry swirl that gives every bite a little sparkle.
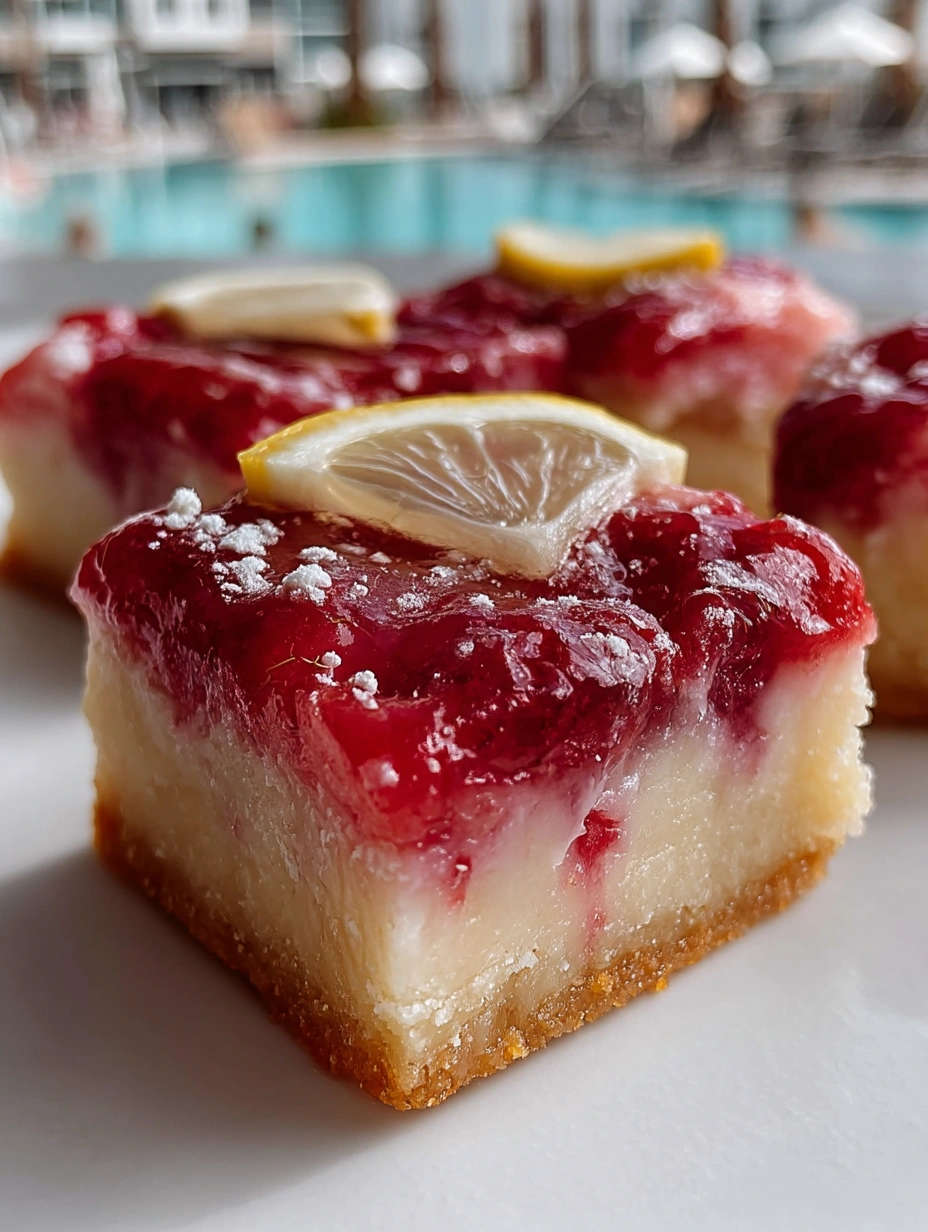
This is the kind of treat that works for spring brunches, summer cookouts, baby showers, potlucks, or a quiet afternoon when you want something sweet but not too heavy. The lemon keeps the bars crisp and lively, while the raspberries add just enough berry sweetness to make them feel special.
Why You’ll Love This Raspberry Lemonade Bars
These bars bring together the best parts of lemon bars and raspberry desserts in one simple pan. The crust is buttery and sturdy enough to hold the filling, while the top bakes into a smooth, tangy layer with little ruby streaks of raspberry running through it.
They also slice beautifully once chilled, which makes them easy to serve for parties or pack into lunch boxes. You do not need fancy decorating skills, a mixer, or complicated steps. A bowl, a whisk, a baking pan, and a little patience while they cool are enough.
The flavor is balanced, not too sour and not overly sweet. Lemon juice gives the bars that lemonade-style brightness, while fresh or frozen raspberries add a jammy finish that feels fresh and homemade.
What Makes Raspberry Lemonade Bars So Refreshing?
The refreshing taste comes from the way lemon and raspberry work together. Lemon juice gives sharp, clean acidity, while lemon zest brings fragrant citrus oils that make the bars taste brighter before you even take a bite. Raspberries add fruitiness and a gentle tart note, so the filling does not feel flat or sugary.
Another detail that matters is chilling. These bars need time in the refrigerator after baking because the filling firms up and the flavors settle. When served cold, the texture becomes smooth and creamy, almost like a citrus custard on top of a crisp shortbread base.
For the best result, use fresh lemon juice instead of bottled juice. Bottled lemon juice can taste harsh or dull, while fresh lemons give the filling a clean lemonade flavor that matches the berries beautifully.
Ingredients for the Raspberry Lemonade Bars

Each ingredient has a clear job in these bars, and together they create the buttery crust, silky lemon filling, and raspberry swirl that make this dessert so memorable.
All-purpose flour: Flour forms the base of the crust and also helps the lemon filling set. It keeps the bars sliceable without making them heavy.
Powdered sugar: Powdered sugar sweetens the shortbread crust and gives it a tender texture. It blends easily with the butter and flour.
Unsalted butter: Butter gives the crust its rich flavor and crumbly shortbread bite. Using unsalted butter lets you control the overall salt level.
Salt: A small amount of salt balances the sweetness and makes the lemon and raspberry flavors taste sharper.
Granulated sugar: Sugar sweetens the lemon filling and helps create that smooth classic lemon bar texture.
Eggs: Eggs give structure to the filling. They help it bake into a soft custard-like layer that holds together when sliced.
Fresh lemon juice: Lemon juice is the main flavor of the filling. It gives the bars their bright lemonade taste.
Lemon zest: Zest adds a stronger citrus aroma than juice alone. It makes the lemon flavor taste fresh and rounded.
Raspberries: Raspberries bring color, sweetness, and tart berry flavor. Fresh raspberries work beautifully, but frozen raspberries can be used too when thawed and drained.
Cornstarch: Cornstarch helps thicken the raspberry swirl so it does not sink too much into the filling or make the bars watery.
Vanilla extract: Vanilla softens the sharp citrus edge and gives the filling a smoother bakery-style flavor.
Powdered sugar for topping: A light dusting makes the finished bars look pretty and adds a delicate sweetness right before serving.
How To Make the Raspberry Lemonade Bars
These bars are simple to make, but the order matters. Bake the crust first, prepare the raspberry swirl, mix the lemon filling, then layer everything while the crust is still warm.
Step 1: Prepare the Pan
Line an 8-inch square baking pan with parchment paper, leaving a little overhang on two sides. This makes it easier to lift the chilled bars out later. Lightly grease the exposed sides of the pan so nothing sticks.
Preheat the oven before you begin so the crust can bake evenly. A fully heated oven helps the shortbread set quickly and prevents a greasy crust.
Step 2: Make the Shortbread Crust
Stir the flour, powdered sugar, and salt together in a bowl. Add the melted butter and mix until the dough looks like soft crumbs that hold together when pressed.
Press the mixture firmly into the bottom of the lined pan. Use the bottom of a measuring cup to make the surface even. A compact crust is important because it creates a clean base for the lemon filling.
Step 3: Bake the Crust
Bake the crust until it looks lightly golden around the edges and dry across the top. It should not be deeply browned, but it should look set.
When the crust comes out of the oven, keep the oven on. The filling should be poured over the warm crust so the layers bond together nicely.
Step 4: Make the Raspberry Swirl
Mash the raspberries with a little sugar and cornstarch in a small saucepan. Cook gently until the berries break down and the mixture thickens into a loose sauce.
For a smoother swirl, press the raspberry mixture through a fine mesh strainer to remove seeds. This step is optional, but it gives the bars a softer texture and cleaner look.
Step 5: Mix the Lemon Filling
Whisk the granulated sugar and flour together first. This helps prevent lumps once the eggs and lemon juice are added.
Add the eggs, lemon juice, lemon zest, and vanilla. Whisk until the filling is smooth and glossy. Try not to whip too much air into it, since excess bubbles can leave marks on the baked surface.
Step 6: Assemble the Bars
Pour the lemon filling over the warm crust. Spoon small dots of raspberry sauce over the top, then use a toothpick or thin knife to gently swirl the raspberry through the lemon layer.
Do not overmix the swirl. A few soft ribbons of raspberry look prettier than a fully blended pink filling.
Step 7: Bake Until Set
Bake until the center is just set and no longer sloshes when the pan is gently moved. A slight jiggle is fine because the bars will continue to firm as they cool.
Avoid overbaking, which can make the filling rubbery or cause cracks. The top should look set, smooth, and lightly glossy.
Step 8: Cool, Chill, and Slice
Let the bars cool at room temperature first, then refrigerate until completely chilled. This step is what gives you neat, clean slices.
Lift the bars from the pan using the parchment paper. Wipe the knife between cuts for tidy edges, then dust with powdered sugar right before serving.
How To Serve Raspberry Lemonade Bars for the Brightest Flavor
Raspberry Lemonade Bars are best served chilled, straight from the refrigerator or after sitting at room temperature for about 10 minutes. The cold temperature keeps the filling firm and makes the citrus flavor taste extra refreshing.
This recipe makes 16 small bars or 9 larger dessert squares. For parties, I like cutting them into 16 pieces because the flavor is rich, tangy, and satisfying in a smaller serving. For a plated dessert, cut larger squares and serve them with fresh raspberries, a few lemon curls, or a spoonful of lightly whipped cream.
They are lovely with iced tea, lemonade, coffee, or a brunch spread with fruit and pastries. Since the bars have a bright pink swirl, they also look beautiful on dessert trays for Easter, Mother’s Day, baby showers, bridal showers, and warm-weather gatherings.
If you are serving them outdoors, keep the bars chilled as long as possible before bringing them out. The filling holds well, but the texture is cleanest when cool.
How To Store Raspberry Lemonade Bars
Store Raspberry Lemonade Bars in an airtight container in the refrigerator. Place parchment paper between layers if stacking them so the tops stay neat. They will keep well for up to 4 days.
For the freshest look, wait to dust them with powdered sugar until right before serving. Powdered sugar can melt into the chilled lemon filling as the bars sit, especially if the refrigerator has moisture.
You can also freeze these bars. Chill and slice them first, then place the pieces on a parchment-lined tray and freeze until firm. Transfer the frozen bars to a freezer-safe container with parchment between layers. They can be frozen for up to 2 months.
To thaw, move the bars to the refrigerator overnight. Serve them cold, and add powdered sugar after thawing. Freezing may soften the crust slightly, but the flavor stays bright and delicious.
Avoid storing the bars at room temperature for long periods because the filling is custard-based. For food safety and best texture, refrigerate leftovers after serving.
Frequently Asked Questions
Can I use frozen raspberries for Raspberry Lemonade Bars?
Yes, frozen raspberries work well. Thaw them first, then drain away extra liquid before cooking them into the raspberry swirl. Frozen berries can release more moisture than fresh berries, so the cornstarch helps thicken the sauce and keeps the lemon filling from becoming watery.
Do I have to strain the raspberry sauce?
No, straining is optional. If you do not mind raspberry seeds, you can leave the sauce as it is. Straining gives the bars a smoother texture and a more elegant swirl, but the flavor is delicious either way.
Why did my lemon bars crack on top?
Cracks usually happen when the bars are overbaked or baked at too high a temperature. Pull them from the oven when the center is just set with a gentle jiggle. They will continue to firm up as they cool and chill.
Can I make Raspberry Lemonade Bars ahead of time?
Absolutely. These bars are actually better after chilling, so they are a great make-ahead dessert. Bake them the day before, refrigerate overnight, then slice and dust with powdered sugar before serving.
How do I get clean slices?
Chill the bars completely before cutting. Use the parchment overhang to lift them from the pan, then slice with a sharp knife. Wipe the blade clean between each cut. This keeps the raspberry swirl and lemon layer looking neat.
Want More Dessert Bar Ideas?
If you love these Raspberry Lemonade Bars, you’ll probably enjoy these other sweet treats from Life With Mira:
• Raspberry Pie Recipe for a berry-filled dessert with classic homemade comfort.
• Oatmeal Jam Bars when you want a simple crumbly bar with a fruity center.
• Lemon Poppy Seed Muffins if you are craving more bright lemon flavor.
• Red Velvet Cheesecake Brownies for a rich, creamy dessert bar with a dramatic finish.
Save This Pin For Later
📌 Save these Raspberry Lemonade Bars to your Pinterest dessert board so you can come back to them whenever you need a bright, easy dessert.
And let me know in the comments how yours turned out. Did you use fresh raspberries or frozen? Did you make the swirl smooth or leave it a little rustic?
I love hearing how others make these recipes their own. Questions are welcome too, and you can find more daily recipe inspiration from Life With Mira.
Raspberry Lemonade Bars
- Total Time: 3 hours
- Yield: 16 bars
- Diet: Vegetarian
Description
These Raspberry Lemonade Bars are bright, buttery, tangy, and sweet with a soft shortbread crust, fresh lemon filling, and a pretty raspberry swirl. They are an easy dessert recipe for spring baking, summer parties, potlucks, brunch ideas, dessert bars, picnic treats, and make-ahead food ideas when you want something fresh, colorful, and simple to slice.
Ingredients
1 cup all-purpose flour
1/4 cup powdered sugar
1/2 cup unsalted butter, melted
1/4 teaspoon salt
1 cup granulated sugar
2 tablespoons all-purpose flour
3 large eggs
1/2 cup fresh lemon juice
1 tablespoon lemon zest
1 teaspoon vanilla extract
3/4 cup raspberries
1 tablespoon granulated sugar
1 teaspoon cornstarch
2 tablespoons powdered sugar for topping
Instructions
1. Preheat the oven to 350°F and line an 8-inch square baking pan with parchment paper, leaving overhang on two sides.
2. In a bowl, mix 1 cup flour, powdered sugar, salt, and melted butter until a soft crust mixture forms.
3. Press the crust firmly into the prepared pan and bake for 16 to 18 minutes, until lightly golden around the edges.
4. While the crust bakes, mash raspberries with 1 tablespoon sugar and cornstarch in a small saucepan. Cook for 3 to 4 minutes until thickened, then strain if desired.
5. In a separate bowl, whisk granulated sugar and 2 tablespoons flour together. Add eggs, lemon juice, lemon zest, and vanilla, then whisk until smooth.
6. Pour the lemon filling over the warm crust. Spoon raspberry sauce over the top and gently swirl with a toothpick or thin knife.
7. Bake for 22 to 26 minutes, until the center is just set with a slight jiggle.
8. Cool at room temperature, then refrigerate for at least 2 hours before slicing.
9. Dust with powdered sugar right before serving.
Notes
Chill the bars fully before slicing so the lemon filling sets cleanly and the edges look neat.
Use fresh lemon juice for the brightest lemonade flavor. Bottled juice can taste dull or sharp.
Dust with powdered sugar right before serving because it can dissolve into the chilled filling over time.
- Prep Time: 20 minutes
- Cook Time: 40 minutes
- Category: Dessert
- Method: Baking
- Cuisine: American
Nutrition
- Serving Size: 1 bar
- Calories: 185
- Sugar: 18g
- Sodium: 45mg
- Fat: 8g
- Saturated Fat: 5g
- Unsaturated Fat: 3g
- Trans Fat: 0g
- Carbohydrates: 27g
- Fiber: 1g
- Protein: 3g
- Cholesterol: 55mg
Keywords: raspberry lemonade bars, lemon bars, raspberry dessert, easy dessert recipe, dessert bars, summer dessert, spring baking, potluck dessert, make ahead dessert
