
Imagine starting your morning with the cozy smell of maple, herbs, and sizzling chicken patties coming from your kitchen. These Homemade Maple Chicken Breakfast Sausages are tender, juicy, lightly sweet, and perfectly savory—everything you love about breakfast sausage, but made from scratch in your own skillet.

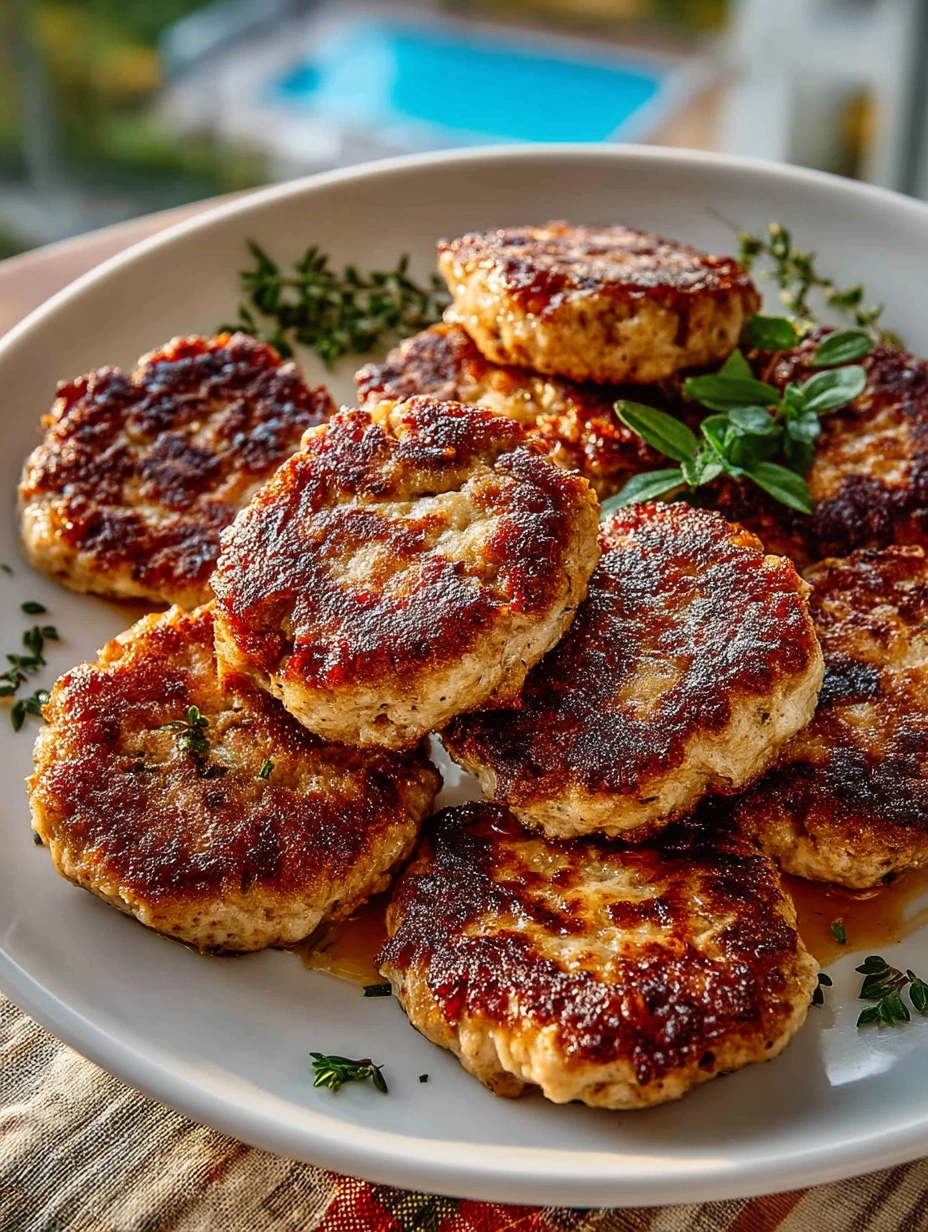
They come together quickly with simple pantry spices and ground chicken, and they’re naturally lighter than traditional pork sausage while still tasting indulgent. Whether you’re cooking a big weekend brunch or stocking the freezer for busy weekday mornings, this maple chicken sausage will become a go‑to in your breakfast rotation.
Why You’ll Love This Homemade Maple Chicken Breakfast Sausage
Homemade breakfast sausage might sound like a project, but this version is surprisingly simple and incredibly rewarding.
- Leaner but still satisfying – Using ground chicken (especially a mix of dark and light meat) gives you a protein‑packed, lighter sausage with all the flavor and comfort you’d expect from a classic breakfast sausage.
- Sweet maple flavor – Pure maple syrup adds a gentle sweetness that caramelizes in the pan, giving the patties beautiful color and irresistible taste.
- No mystery ingredients – You control the seasoning, the amount of salt, and the quality of your meat. No weird fillers or unpronounceable ingredients—just real food.
- Perfect for meal prep – These patties keep well in the fridge and freezer, so you can cook once and enjoy several quick breakfasts throughout the week.
- Versatile – Serve them alongside eggs and toast, tuck them into breakfast sandwiches, crumble them into breakfast burritos, or pair them with pancakes and fruit.
Once you make your own maple chicken sausage, it’s hard to go back to store‑bought.
What Makes Homemade Maple Chicken Breakfast Sausage So Special?
If you’ve only ever bought frozen sausage patties, you might be wondering what the big difference is when you make them at home.
First, the texture: freshly mixed ground chicken seasoned with herbs and spices stays tender and juicy, especially when you avoid over‑working the meat and cook the patties gently over medium heat. You get a nice golden crust on the outside while the center stays moist.
Second, the flavor balance: this recipe layers savory notes (garlic, onion, thyme, paprika) with a touch of heat from red pepper flakes and sweetness from real maple syrup. The result is a well‑rounded flavor that feels both comforting and a little bit special.
Finally, there’s the customization factor: prefer things a bit less sweet or a bit spicier? You can easily tweak the seasoning to suit your taste or the preferences of your family.
Ingredients for Homemade Maple Chicken Breakfast Sausage
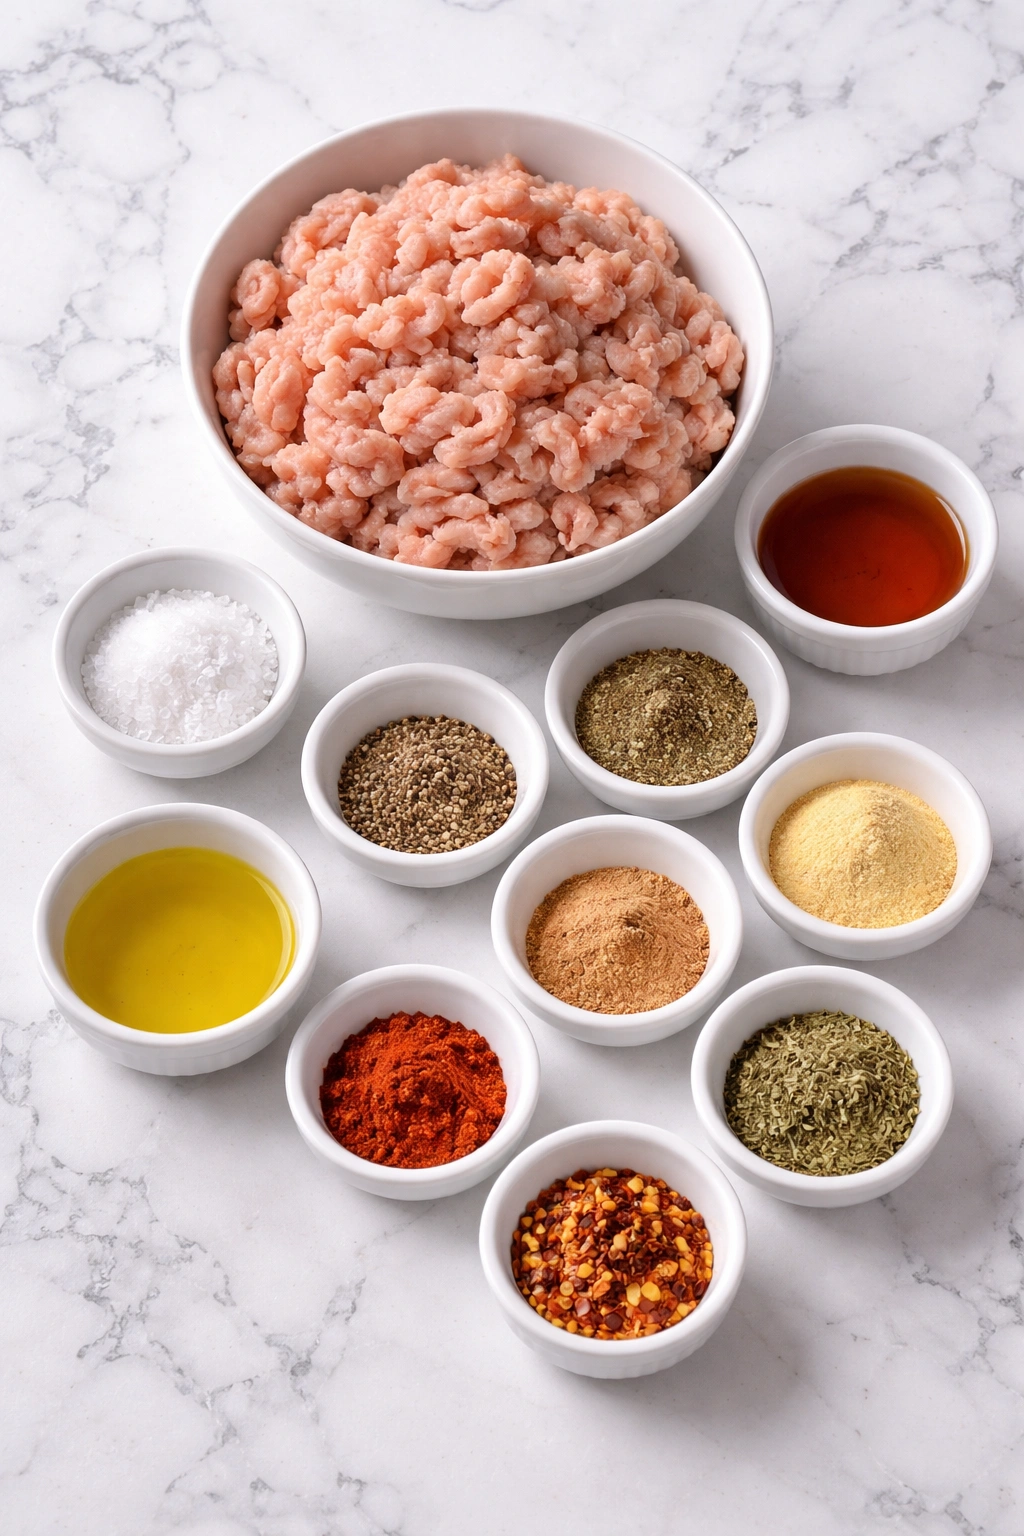
Before you start cooking, it helps to understand how each ingredient earns its place in the bowl. In this section, we’ll talk about what you need and why it matters—quantities will come later in the printable recipe card.
- Ground chicken – The base of your sausage. Using ground chicken (ideally a mix that includes some dark meat) keeps the patties juicy while still feeling lighter than pork.
- Pure maple syrup – Adds natural sweetness and that classic maple flavor that pairs beautifully with breakfast dishes. It also helps the patties brown nicely.
- Kosher salt – Essential for bringing out the flavors of the chicken and spices. It seasons the meat throughout so every bite tastes well balanced.
- Black pepper – Adds a gentle warmth and depth of flavor without making the sausage spicy.
- Garlic powder – Gives a savory backbone and a hint of richness without the texture of fresh garlic, which can sometimes burn.
- Onion powder – Adds mild sweetness and savory notes, mimicking the flavor of sautéed onions in an easy, mix‑in form.
- Smoked paprika – Brings a subtle smokiness and enhances the color of the patties, making them look extra appetizing.
- Crushed red pepper flakes – Just a pinch adds a light kick that balances the sweetness of the maple. You can add more or less depending on your heat preference.
- Dried thyme – A classic breakfast sausage herb that adds an earthy, aromatic note and rounds out the savory flavors.
- Olive oil or neutral cooking oil – Used for cooking the patties so they sear without sticking and develop a crisp, golden exterior.
Once these simple ingredients are in your kitchen, you’re only a few steps away from homemade sausage heaven.
How To Make Homemade Maple Chicken Breakfast Sausage
Making these maple chicken sausages is as easy as mix, shape, and cook. Take your time with the mixing and shaping steps to get tender patties that cook evenly.
Step 1: Mix the Chicken and Seasonings
Add the ground chicken to a large mixing bowl. Drizzle in the maple syrup, then sprinkle the salt, black pepper, garlic powder, onion powder, smoked paprika, crushed red pepper flakes, and dried thyme evenly over the top.
Use clean hands or a spatula to gently mix everything together until the seasonings are evenly distributed. Try not to over‑mix; you want the chicken just combined so the patties stay tender and not dense.
Step 2: Shape the Sausage Patties
Lightly oil your hands, then divide the mixture into equal portions. Roll each portion into a ball and flatten it into a small patty about 1/2 inch thick.
Keep the patties roughly the same size so they cook at the same rate. You can lay them on a parchment‑lined baking sheet or plate as you work. If the mixture feels sticky, chilling it for 10–15 minutes in the fridge can make shaping easier.
Step 3: Cook Until Golden and Juicy
Heat a thin layer of oil in a large skillet over medium heat. Once the oil is shimmering, add the patties in a single layer without overcrowding the pan.
Cook the sausage patties for several minutes per side, flipping once, until they’re deeply golden on the outside and cooked through in the center. Use a meat thermometer if you have one—the internal temperature should reach 165°F (74°C).
If your skillet is small, cook in batches and add a little more oil if needed between batches.
Step 4: Serve or Save for Later
Transfer the cooked patties to a paper‑towel‑lined plate to rest for a couple of minutes. Serve them hot right away, or let them cool completely if you plan to store or freeze them for later.
These sausages are delicious on their own, sandwiched in a biscuit or English muffin, or served alongside eggs, toast, and fruit for a complete breakfast.
How to Serve Homemade Maple Chicken Breakfast Sausage
Homemade Maple Chicken Breakfast Sausage is incredibly versatile, so you can easily build it into whatever kind of breakfast or brunch you’re craving.
This recipe makes about 12 small patties, which comfortably serves 4 people (about 3 patties each) when paired with sides like eggs, toast, potatoes, or fruit.
Here are a few serving ideas:
- Classic breakfast plate – Serve the patties with scrambled or fried eggs, toast or biscuits, and a side of fresh fruit.
- Breakfast sandwiches – Tuck a patty into a toasted English muffin, bagel, or croissant with a fried egg and cheese.
- Protein boost for sweet breakfasts – Pair the sausage with pancakes, waffles, or French toast to balance all that syrupy sweetness.
- Brunch board – Arrange the patties on a platter with roasted potatoes, fresh berries, sliced avocado, and a few sauces for dipping.
Whether you’re cooking for just yourself or a hungry crowd, these sausages help round out the plate and make breakfast feel complete.
How to Store and Reheat Homemade Maple Chicken Breakfast Sausage
One of the biggest perks of this recipe is how well it stores. You can make a batch on the weekend and enjoy stress‑free, protein‑packed breakfasts all week long.
In the refrigerator:
- Let the cooked patties cool completely.
- Store them in an airtight container, layering with parchment paper if needed to prevent sticking.
- Refrigerate for up to 4 days.
To reheat, warm them gently in a skillet over medium‑low heat with a small splash of water and a lid to keep them moist, or microwave in short bursts until heated through.
In the freezer:
- Arrange cooled patties in a single layer on a parchment‑lined baking sheet and freeze until solid.
- Transfer the frozen patties to a freezer‑safe bag or container, squeezing out excess air.
- Label with the date and freeze for up to 2–3 months.
Reheat from frozen by warming the patties in a covered skillet over low heat or in the oven at 325°F (165°C) until hot in the center. You can also thaw them overnight in the fridge for faster reheating in the morning.
Proper storage means you’re never more than a few minutes away from a cozy, homemade breakfast.
Frequently Asked Questions
Can I use ground turkey instead of ground chicken?
Yes, ground turkey works well in this recipe. Choose a ground turkey that isn’t ultra‑lean (a mix that includes dark meat is ideal) so the patties stay juicy. The seasonings and maple syrup pair beautifully with turkey, though the flavor will be slightly different from chicken.
How sweet are these maple chicken sausages?
These sausages are lightly sweet, not dessert‑sweet. The maple syrup adds just enough sweetness to balance the savory spices and create a nice glaze as the patties cook. If you prefer a more subtle maple flavor, you can reduce the syrup slightly; if you like things sweeter, you can drizzle a bit more over the cooked sausage when serving.
Can I make the patties ahead of time and cook them later?
Absolutely. You can mix and shape the raw patties, then place them on a parchment‑lined baking sheet, cover tightly, and refrigerate for up to 24 hours before cooking. Let them sit at room temperature for about 10–15 minutes while you preheat the skillet so they cook evenly.
Do these sausages freeze well?
Yes, they freeze beautifully. For the best texture, cook the patties first, cool them completely, then freeze them in a single layer before transferring to a freezer bag or container. This way you can grab just what you need and reheat directly from frozen for quick breakfasts.
How do I keep the patties from drying out?
To keep your sausage patties moist, avoid over‑mixing the meat, don’t press down on them while they cook, and use medium (not high) heat so they cook through gently. A little oil in the pan and a brief rest after cooking also help lock in the juices.
Want More Breakfast Ideas?
If you love these Homemade Maple Chicken Breakfast Sausages, you’ll probably enjoy some of these other cozy breakfast favorites too:
- Very Berry Quinoa Breakfast Bowl for a bright, protein‑packed start to the day.
- Mini Frittata Muffins when you want grab‑and‑go eggs loaded with veggies and cheese.
- Croissant Breakfast Sandwiches for a buttery, flaky option that feels brunch‑worthy.
- Apple Cinnamon Overnight Oats when you need a make‑ahead breakfast that’s creamy, cozy, and ready in the fridge.
Save a few of these ideas for busy mornings, and you’ll never be stuck wondering what to make for breakfast.
Save This Pin For Later
📌 Save this Homemade Maple Chicken Breakfast Sausage recipe to your Pinterest breakfast board so you can come back to it any time.
Make a batch on the weekend, try it in different breakfast sandwiches, or pair it with your favorite pancakes or waffles. Then come back and let me know how yours turned out—did you make it spicier, a little less sweet, or keep it exactly as written?
I love hearing how you make these recipes your own. Questions are always welcome too—let’s help each other cook breakfast that feels special, even on the busiest mornings.
For even more easy breakfast ideas and step‑by‑step recipes, follow along on Life With Mira.
Homemade Maple Chicken Breakfast Sausage
- Total Time: 90
- Yield: 24 truffles
- Diet: Vegetarian
Description
These Brown Sugar Toffee Truffles are rich, bite-sized chocolate treats with a buttery brown sugar center, crunchy toffee bits, and a glossy chocolate shell—perfect for parties, gifting, or whenever you need an easy recipe to satisfy your sweet tooth. They’re a fun addition to your dessert and food ideas collection, and while they’re not a quick breakfast or easy dinner, they fit right alongside your favorite healthy snack swaps, breakfast ideas, and dinner ideas as a make-ahead treat you can keep in the fridge or freezer for whenever cravings hit.
Ingredients
1/2 cup unsalted butter, melted
3/4 cup packed dark brown sugar
1/4 cup heavy cream
1 teaspoon vanilla extract
1/4 teaspoon fine sea salt
2 cups powdered sugar
1 cup graham cracker or digestive biscuit crumbs
1/2 cup finely chopped pecans (optional)
1/2 cup toffee bits, plus extra for topping
2 1/2 cups semi-sweet chocolate chips or chopped chocolate
2 teaspoons coconut oil or neutral oil
Flaky sea salt, for topping (optional)
Instructions
1. Melt the butter in a small saucepan over medium heat. Stir in the dark brown sugar, heavy cream, and fine sea salt. Cook, stirring often, just until the mixture is smooth and tiny bubbles appear around the edges, 2–3 minutes. Remove from the heat and let cool for about 10 minutes.
2. Transfer the cooled brown sugar mixture to a mixing bowl and stir in the vanilla extract. Gradually add the powdered sugar, mixing until thick and smooth.
3. Add the graham cracker or digestive biscuit crumbs, toffee bits, and chopped pecans (if using). Stir until everything is evenly combined and the mixture forms a soft dough that holds together when pressed. If it feels too sticky, add a bit more crumbs; if too dry, add a teaspoon of cream.
4. Cover the bowl and refrigerate for 45–60 minutes, or until the mixture is firm enough to scoop and roll into balls without sticking badly to your hands.
5. Line a baking sheet with parchment paper. Use a small cookie scoop or spoon to portion the dough into 1-tablespoon mounds. Roll each portion between your palms to form smooth balls and place them on the baking sheet. Freeze for 20–30 minutes, until firm.
6. Place the semi-sweet chocolate and coconut oil or neutral oil in a heatproof bowl. Melt in the microwave in 20–30 second bursts, stirring between each, until smooth and glossy, or melt over a double boiler.
7. Working with a few truffles at a time, use a fork to dip each chilled ball into the melted chocolate, turning to coat. Tap off the excess chocolate on the side of the bowl and return the truffle to the parchment-lined baking sheet. Immediately sprinkle with extra toffee bits and flaky sea salt, if using.
8. Refrigerate the tray for 20–30 minutes, until the chocolate is fully set. Transfer the truffles to an airtight container and store in the refrigerator until ready to serve.
Notes
Chill the truffle mixture long enough so it’s firm but still scoopable—this makes rolling cleaner and helps the truffles keep their shape.
If the chocolate coating starts to thicken while you’re dipping, warm it in short bursts in the microwave and stir until smooth again.
For neat edges, use a toothpick to nudge away any chocolate “feet” around the base of each truffle before the coating fully sets.
- Prep Time: 25
- Cook Time: 10
- Category: Dessert
- Method: No-Bake
- Cuisine: American
Nutrition
- Serving Size: 2 truffles
- Calories: 480
- Sugar: 53
- Sodium: 120
- Fat: 26
- Saturated Fat: 14
- Unsaturated Fat: 12
- Trans Fat: 0
- Carbohydrates: 64
- Fiber: 3
- Protein: 3
- Cholesterol: 25
Keywords: brown sugar toffee truffles, easy truffles, no bake dessert, holiday candy, Christmas treats, easy recipe, food ideas
