

Get ready to bring some Halloween magic to your dessert table with these whimsical and easy-to-make Halloween Witch Hat Cookies. With their playful charm and rich chocolatey crunch, these festive treats are perfect for parties, trick-or-treat goodie bags, or baking with kids. You don’t need to be a baking expert to pull these off—a few store-bought ingredients and a touch of creative spirit is all it takes.
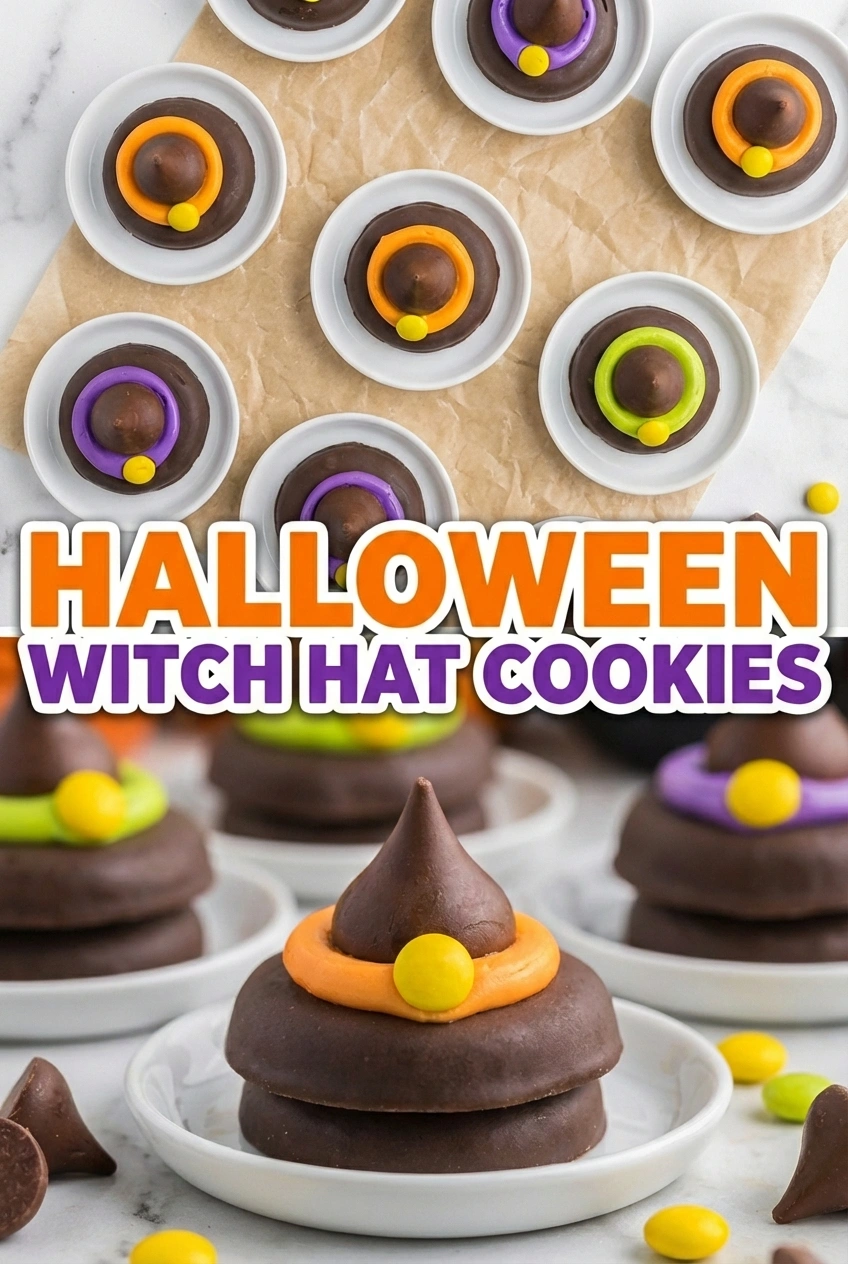
Imagine a tray full of little edible witch hats: chocolate-dipped cookies crowned with candy cones and decorated in bold Halloween colors. Not only are they delightful to look at, but they taste amazing too! This is one of those recipes that proves you can impress guests with minimal effort and maximum impact.
Why You’ll Love These Halloween Witch Hat Cookies
They’re spooky-cute, require no baking, and are endlessly customizable. Whether you want to use orange icing, purple sprinkles, or go full black-and-green witchy vibes, these cookies adapt to your Halloween aesthetic. They’re also great for making ahead of time and holding up beautifully at room temperature.
What Kind of Cookies Should I Use?
Flat, round cookies work best as the hat’s brim. Think chocolate-covered shortbread, fudge rounds, or even simple digestive biscuits. You want something sturdy enough to support the weight of the cone and frosting without getting soggy or crumbly. Bonus if they already have a chocolate coating!
Ingredients for the Halloween Witch Hat Cookies
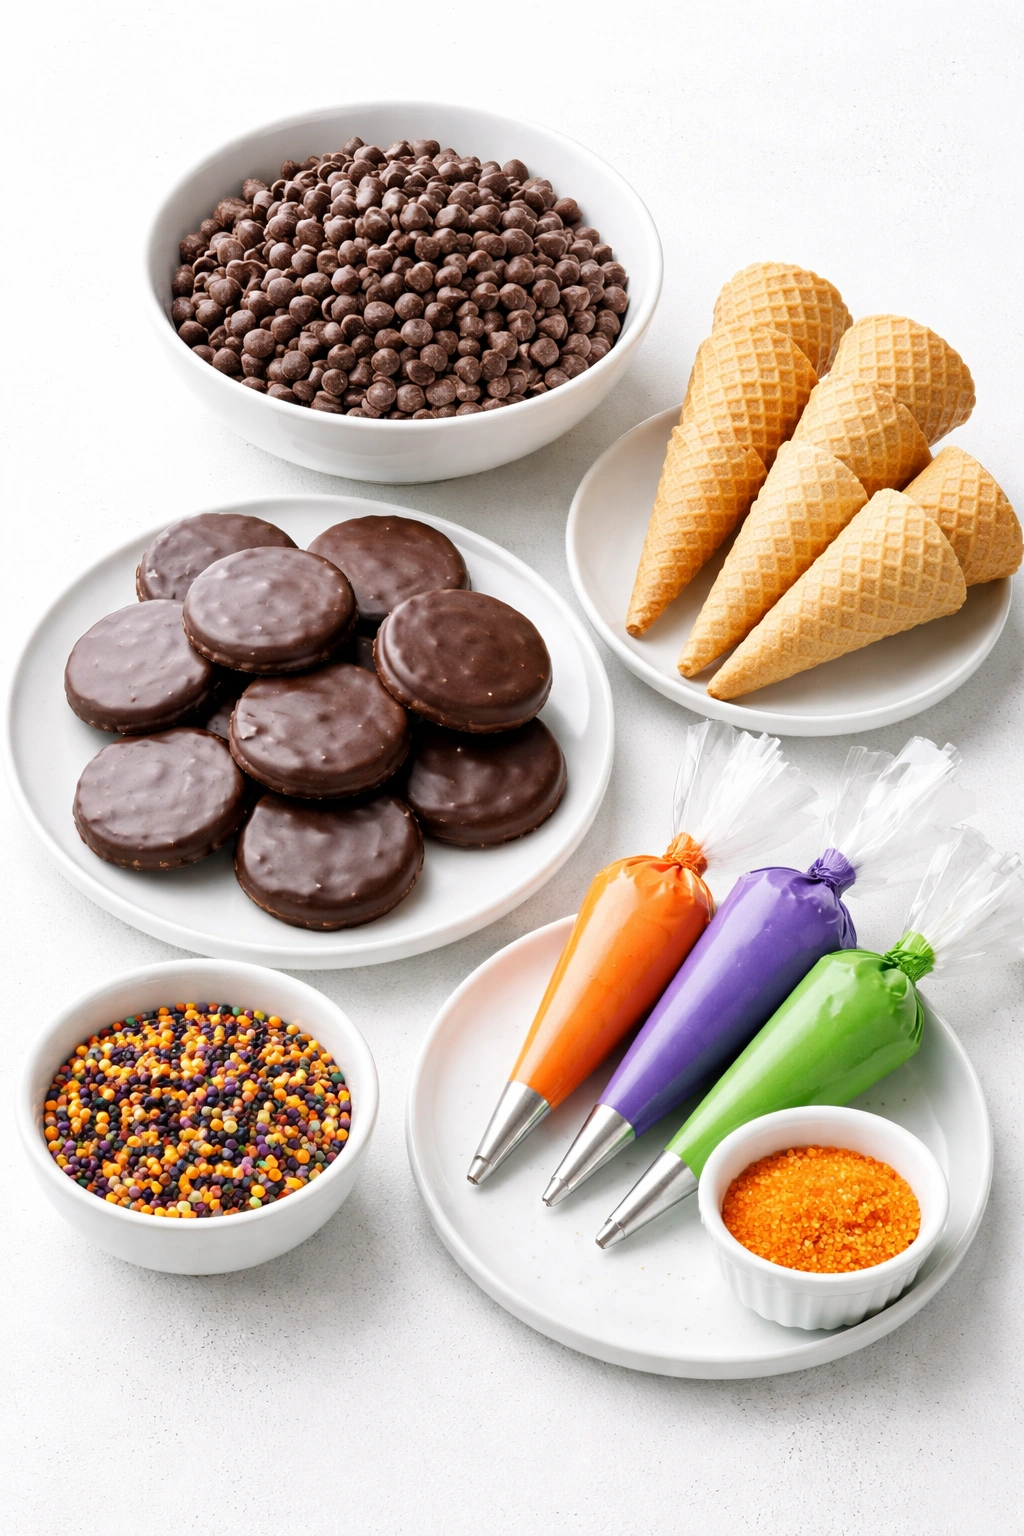
Each ingredient adds structure, sweetness, or that whimsical Halloween flair to your cookies.
Chocolate-coated cookies are the base of the hat. They add crunch and support.
Sugar cones form the pointed witch hat. Their shape is ideal, and they pair perfectly with melted chocolate.
Semi-sweet chocolate chips are used for coating and “gluing” everything together.
Sprinkles and colored sugar add that festive sparkle and texture.
Colored frosting or gel icing is used to pipe decorative details like hat bands or stars.
How To Make the Halloween Witch Hat Cookies
Step 1: Melt the Chocolate
In a microwave-safe bowl, melt 1 1/2 cups of semi-sweet chocolate chips in 30-second intervals, stirring until smooth. This will serve as both coating and glue.
Step 2: Dip the Cones
Hold each sugar cone and dip it into the melted chocolate until fully coated. Let the excess drip off, then set them upside down on a parchment-lined tray. Chill in the fridge for 10 minutes until the chocolate firms up.
Step 3: Attach to Cookies
Spread a little melted chocolate on the bottom rim of each cone and gently press it onto the center of a chocolate cookie. Hold for a few seconds to ensure it sticks. Let them set for another 5-10 minutes.
Step 4: Decorate the Hats
Once assembled, use colored icing to pipe a band around the base of each cone where it meets the cookie. Add sprinkles, stars, or colored sugar while the icing is still wet.
Step 5: Let Them Set
Allow everything to dry and set completely at room temperature. Then transfer to a serving plate or airtight container for storage.
How to Serve These Spooky Hats
These Halloween Witch Hat Cookies are great as a grab-and-go treat at Halloween parties or tucked into themed lunchboxes. They make about 12 hats and can serve 12 people, especially when part of a larger treat spread.
How to Store the Witch Hat Cookies
Store your witch hat cookies in an airtight container at room temperature for up to 5 days. If your home is warm, refrigerate them to prevent the chocolate from melting. Just be sure to bring them to room temp before serving for best texture and flavor. Avoid stacking them or use parchment between layers to protect the decorations.
Frequently Asked Questions
1. Can I make these in advance?
Yes! These cookies can be made 2-3 days ahead of your party. Just keep them sealed and cool.
2. What kind of cones should I use?
Standard sugar cones work best because of their sharp, witchy shape and ability to hold chocolate coating well.
3. Can I make these gluten-free?
Absolutely! Just use gluten-free cookies and cones, and double-check your sprinkles and decorations.
4. What type of chocolate is best for melting?
Semi-sweet or dark chocolate chips melt smoothly and provide a rich, balanced flavor.
5. Do I have to use frosting for decoration?
Not at all. You can use colored candy melts, edible glitter, or even small candy belts instead of frosting.
Want More Cookie Ideas with a Twist?
If you love these Halloween Witch Hat Cookies, you might enjoy these other magical bakes:
- Soft Pumpkin Snickerdoodles with Cinnamon Sugar
- Red Velvet Cheesecake Brownies
- Salted Caramel Cake That Melts in Your Mouth
- Oreo Stuffed Cinnamon Rolls
- Mini Tiramisu Cups
Save This Pin For Later
📌 Save this recipe to your Pinterest Halloween board so you can come back to it any time.
And let me know in the comments how your witch hat cookies turned out. Did you add purple glitter or a spider candy on top? Get creative and have fun with it!
I love hearing how you make these spooky treats your own. And for more holiday and everyday ideas, check out Life With Mira on Pinterest!
Print Halloween Witch Hat Cookies
- Total Time: 20 minutes
- Yield: 12 cookies
- Diet: Vegetarian
Description
Start your Halloween party off right with these no-bake Halloween Witch Hat Cookies—an easy recipe that’s festive, fun, and perfect for kids and adults alike. Made with chocolate-dipped cones, crunchy cookies, and spooky decorations, this treat is one of the best quick dessert ideas for October gatherings. Whether you’re searching for Halloween snacks, cookie party treats, or creative no-bake dessert ideas, these are the perfect pick!
Ingredients
12 chocolate-coated cookies
12 sugar cones
1 1/2 cups semi-sweet chocolate chips
Colored frosting or gel icing (about 1/4 cup)
1/4 cup sprinkles or colored sugar
Instructions
1. Melt 1 1/2 cups of semi-sweet chocolate chips in a microwave-safe bowl, stirring every 30 seconds until smooth.
2. Dip each sugar cone into the melted chocolate to fully coat it, allowing the excess to drip off. Place them upside down on parchment paper and chill for 10 minutes.
3. Spread a bit of the remaining melted chocolate on the base of each cone and press onto the center of a chocolate cookie. Hold briefly to secure.
4. Once attached, pipe a band of colored frosting around the base of each cone. Decorate with sprinkles or sugar while the icing is wet.
5. Let the cookies set completely before serving or storing.
Notes
Be sure to use flat-bottomed cookies to help the hat stay upright.
If decorating with kids, prep the cones ahead to avoid mess.
Store in a single layer to protect decorations.
- Prep Time: 20 minutes
- Cook Time: 0 minutes
- Category: Dessert
- Method: No-Bake
- Cuisine: American
Nutrition
- Serving Size: 1 cookie
- Calories: 215
- Sugar: 17g
- Sodium: 65mg
- Fat: 10g
- Saturated Fat: 6g
- Unsaturated Fat: 3g
- Trans Fat: 0g
- Carbohydrates: 30g
- Fiber: 1g
- Protein: 2g
- Cholesterol: 5mg
Keywords: halloween cookies, no bake halloween treats, witch hat cookies
