


Bright green, soft-baked, and topped with a sweet red heart, Grinch Cookies Decorated are the kind of holiday treat that instantly makes a dessert table feel more playful. They bring that cheerful Christmas look everyone recognizes, but the flavor is just as lovable as the appearance, with a buttery cookie base, festive color, and a fun finish that makes each cookie feel special.

These cookies are perfect for cookie swaps, classroom parties, family movie nights, and holiday baking weekends when you want something easy to decorate without needing advanced piping skills. The red heart on top gives them that signature Grinch-inspired touch, while the soft centers and lightly crisp edges make them just as good to eat as they are to show off.
Why You’ll Love This Grinch Cookies Decorated
These cookies are festive in the best way. The bright green color stands out on any holiday platter, and the red candy heart adds a simple decoration that looks adorable without requiring a lot of work.
They are also a great baking project for families. Kids love helping roll the dough, add the sugar coating, and press the heart candies on top. Since the decorating is easy and forgiving, the whole process feels fun instead of stressful.
Another reason to love these Grinch Cookies Decorated is how well they fit into the holiday season. They are cute enough for gifting, simple enough for a weekend batch, and flavorful enough that people will reach for seconds. If you need a Christmas cookie that feels playful, memorable, and crowd-pleasing, this one checks every box.
What Makes Grinch Cookies Decorated So Festive?
The magic is in the color and the finishing touch. A soft green cookie instantly brings the Grinch theme to life, and the red heart candy ties the whole look together in a way that feels fun and recognizable.
Beyond the appearance, these cookies have that cozy holiday cookie texture people always want in December. They feel homemade, charming, and easy to share. You get a dessert that looks themed without needing complicated decorations or specialty techniques.
Ingredients for the Grinch Cookies Decorated
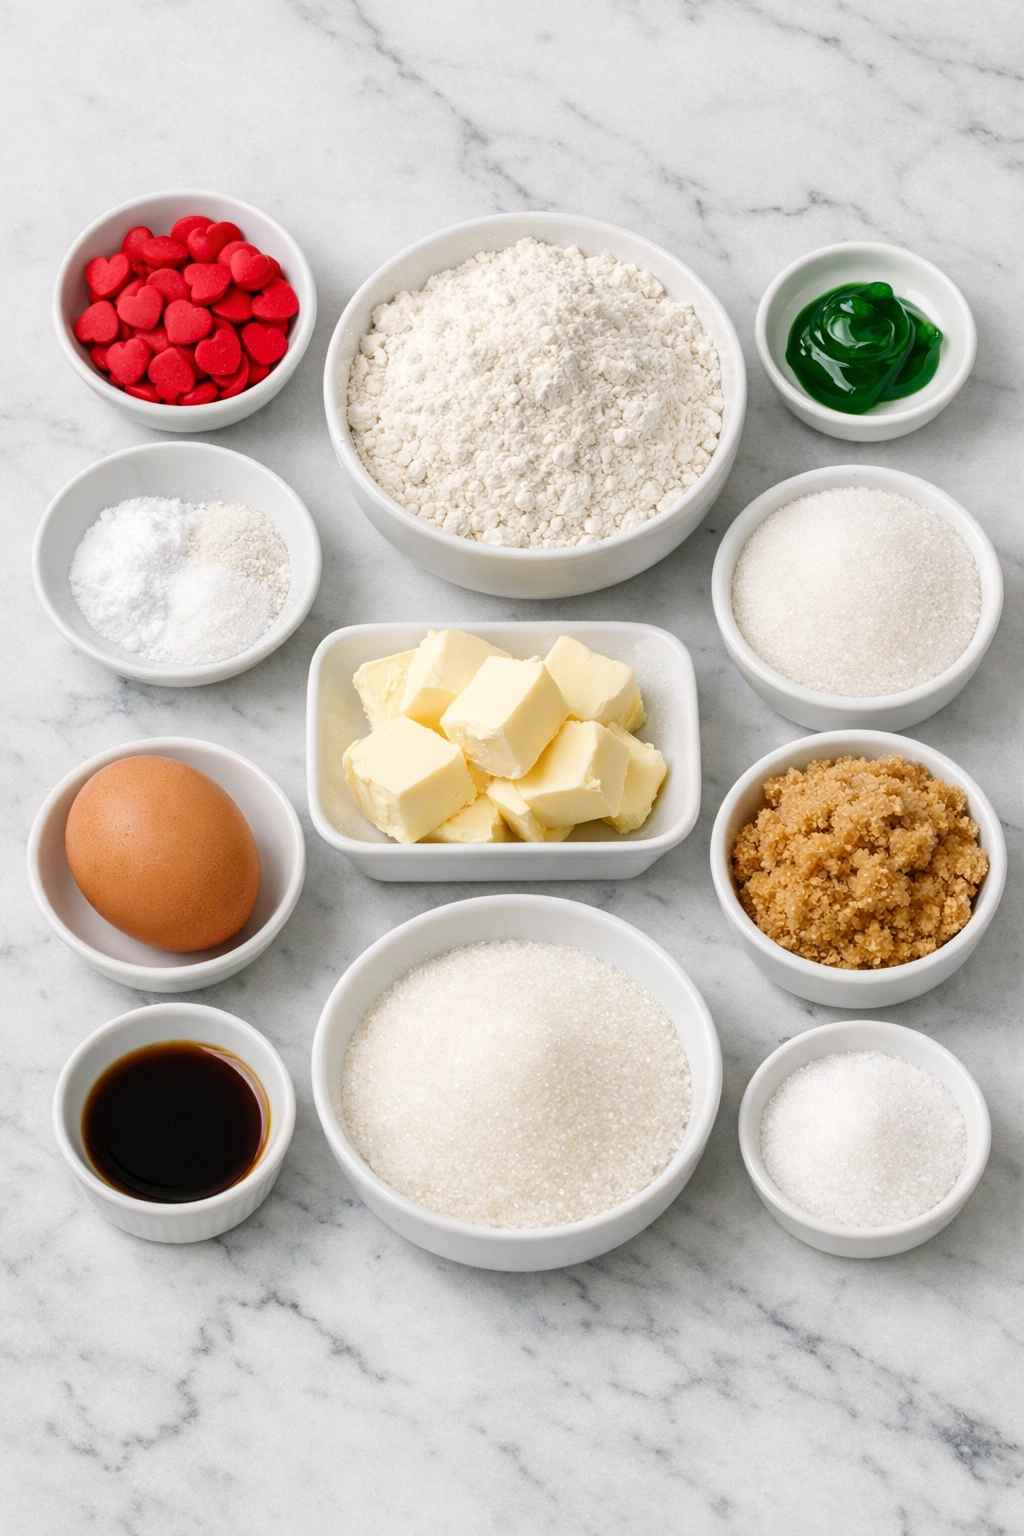
Butter gives these cookies their rich flavor and helps create a soft, tender bite. Using butter also adds that classic holiday cookie taste that makes each batch feel homemade and comforting.
Granulated sugar sweetens the dough and helps create a pleasant structure. It also works well for rolling the cookie dough before baking, giving the outside a sparkly finish.
Brown sugar adds moisture and a little depth, which keeps the cookies from tasting flat. It helps balance the sweetness and supports that soft center.
Eggs hold the dough together and help the cookies bake up with a tender texture. They also add richness to the overall flavor.
Vanilla extract rounds out the sweetness and adds warmth. Even a small amount makes the cookies taste fuller and more bakery-style.
All-purpose flour forms the base of the dough and gives the cookies their shape. It is the structure that holds everything together.
Baking soda helps the cookies rise slightly and spread just enough. This keeps them from turning dense or heavy.
Salt sharpens the sweetness and keeps the flavor balanced. It is a small ingredient that makes a big difference in the final taste.
Green food coloring gives the cookies their signature Grinch-inspired look. Gel coloring is especially helpful if you want a more vibrant green without adding extra liquid.
Red heart candies are the finishing detail that turns these cookies into Grinch Cookies Decorated. They add charm, color contrast, and the iconic little heart that makes the design instantly recognizable.
Powdered sugar is optional for a slightly crinkled effect if you want a softer snowy finish. It can be used alone or alongside granulated sugar depending on the style you want.
How To Make the Grinch Cookies Decorated
Before you begin, line your baking sheets with parchment paper and preheat the oven. Having everything ready makes the process smoother, especially once the dough is mixed and colored.
Step 1: Cream the Butter and Sugars
Beat the butter, granulated sugar, and brown sugar together until the mixture looks light and fluffy. This step helps create a soft cookie texture and gives the dough a smooth, even base.
Step 2: Add the Wet Ingredients
Mix in the eggs and vanilla extract until fully combined. Add the green food coloring and keep mixing until the color is evenly distributed throughout the dough. If you want a bold holiday green, add the coloring gradually until you reach the shade you like.
Step 3: Mix the Dry Ingredients
In a separate bowl, whisk together the flour, baking soda, and salt. This helps distribute the leavening evenly so the cookies bake consistently.
Step 4: Form the Dough
Add the dry ingredients to the wet mixture and stir until a soft dough forms. Scoop portions of dough and roll them into balls. Coat them lightly in granulated sugar or powdered sugar, depending on the finish you want.
Step 5: Bake Until Just Set
Place the dough balls on the prepared baking sheets with enough space between them. Bake until the edges are set and the centers still look slightly soft. That slight softness is what helps keep the cookies tender after cooling.
Step 6: Add the Red Heart Decoration
As soon as the cookies come out of the oven, gently press one red heart candy into the center of each cookie. Do this while the cookies are still warm so the candy settles into place without cracking the cookie surface too much.
Step 7: Cool and Serve
Let the cookies rest on the baking sheet for a few minutes before moving them to a wire rack. Once cooled, they are ready to serve, gift, or arrange on a holiday dessert tray.
Best Ways to Serve Grinch Cookies Decorated
Grinch Cookies Decorated are perfect for holiday platters, cookie exchanges, Christmas classroom parties, and cozy family movie nights. Their bright color makes them stand out next to classic sugar cookies, gingerbread, and chocolate treats, so they add variety and visual fun to any dessert spread.
They are also a great choice for edible gifts. Pack them into cookie boxes or festive tins with parchment between the layers so the heart decorations stay neat. Serve them with hot cocoa, peppermint mochas, coffee, or a glass of cold milk for a simple holiday treat everyone enjoys.
This recipe feeds about 24 people if you serve one cookie per person, or about 12 people if you plan for two cookies each as part of a larger dessert table.
How to Store Grinch Cookies Decorated
Store the cooled cookies in an airtight container at room temperature for up to 5 days. Keeping them sealed helps preserve their softness and keeps the sugar coating from getting sticky too quickly.
If you want to stack them, place parchment paper between the layers so the red heart candies do not press into the cookies underneath. This also helps the cookies keep their decorated appearance for parties or gifting.
For longer storage, freeze the cookies in a freezer-safe container for up to 2 months. Let them cool completely first, then freeze in layers separated with parchment. Thaw them at room temperature before serving.
You can also freeze the dough balls before baking. Arrange them on a tray until firm, then transfer to a freezer bag. When you are ready to bake, place them on a baking sheet and add a few extra minutes to the baking time if needed. Add the red heart candies after baking, not before, for the best finished look.
Frequently Asked Questions
Can I make Grinch Cookies Decorated ahead of time?
Yes, these cookies work very well as a make-ahead holiday dessert. You can bake them a day or two in advance and store them in an airtight container until you are ready to serve them. You can also prepare the dough ahead and chill it overnight if that fits your baking schedule better.
What kind of green food coloring works best?
Gel food coloring is usually the best choice because it creates a vibrant green without thinning the dough. Liquid food coloring also works, but you may need more of it to get that classic Grinch-inspired shade.
When should I add the red heart candies?
Add them right after the cookies come out of the oven. The cookies will still be soft and warm, which makes it easy to press the hearts into the tops without breaking the cookies.
Can I use a cake mix for Grinch Cookies Decorated?
Yes, some bakers like using a cake mix version for convenience. A homemade dough usually gives you a richer buttery flavor and a more classic cookie texture, but a cake mix shortcut can still make a fun and festive batch.
How do I keep the cookies soft?
Avoid overbaking them. Pull them from the oven when the edges are set but the centers still look slightly soft. Once they cool, store them in an airtight container so they stay tender and fresh.
Want More Cookie Ideas?
If you love these Grinch Cookies Decorated, you might also enjoy a few other sweet treats from the site:
- Winter Wonderland Chocolate Chip Christmas Cookies for another festive holiday cookie tray favorite.
- Soft Pumpkin Snickerdoodles with Cinnamon Sugar when you want soft cookies with warm seasonal flavor.
- Red Velvet Cheesecake Brownies for a rich and colorful dessert that feels celebration-ready.
- Hot Buttered Mini Donuts if you want another fun homemade treat for sharing.
Save This Pin For Later
📌 Save this recipe to your Pinterest dessert board so you can come back to it any time.
And let me know in the comments how your Grinch Cookies Decorated turned out. Did you go bright green, keep them soft and chewy, or make them extra festive for a party tray?
I love hearing how others make these holiday treats their own. Questions are welcome too, and you can always find more recipe inspiration on Life With Mira.
Grinch Cookies Decorated
- Total Time: 25 minutes
- Yield: 24 cookies
- Diet: Vegetarian
Description
These Grinch Cookies Decorated are a fun, festive Christmas treat with a soft buttery center, bright green color, and a sweet red heart on top. They are perfect for holiday baking, cookie swaps, easy dessert ideas, party food ideas, and Christmas dessert boards when you want an easy recipe that looks cheerful and tastes just as good.
Ingredients
2 1/4 cups all-purpose flour
1/2 teaspoon baking soda
1/4 teaspoon salt
3/4 cup unsalted butter, softened
1/2 cup granulated sugar
1/2 cup light brown sugar
1 large egg
1 teaspoon vanilla extract
1 teaspoon green gel food coloring
1/2 cup granulated sugar, for rolling
24 red heart candies
Instructions
1. Preheat the oven to 350°F and line two baking sheets with parchment paper.
2. In a medium bowl, whisk together the flour, baking soda, and salt.
3. In a large mixing bowl, beat the softened butter, granulated sugar, and brown sugar until light and fluffy.
4. Mix in the egg and vanilla extract until smooth.
5. Add the green gel food coloring and mix until the dough is evenly colored.
6. Gradually add the dry ingredients to the wet ingredients and mix until a soft dough forms.
7. Scoop the dough into equal portions and roll into balls.
8. Roll each dough ball in the extra granulated sugar to coat the outside.
9. Place the dough balls on the prepared baking sheets, leaving space between each one.
10. Bake for 9 to 11 minutes, until the edges are set and the centers still look slightly soft.
11. Remove the cookies from the oven and immediately press one red heart candy into the center of each cookie.
12. Let the cookies cool on the pan for 5 minutes, then transfer to a wire rack to cool completely.
Notes
Use gel food coloring for the brightest green without changing the dough texture.
Do not overbake the cookies if you want them soft and chewy in the center.
Press the heart candies in right after baking so they stick neatly without cracking the tops too much.
- Prep Time: 15 minutes
- Cook Time: 10 minutes
- Category: Dessert
- Method: Baking
- Cuisine: American
Nutrition
- Serving Size: 1 cookie
- Calories: 135
- Sugar: 10g
- Sodium: 75mg
- Fat: 6g
- Saturated Fat: 3.5g
- Unsaturated Fat: 2g
- Trans Fat: 0g
- Carbohydrates: 19g
- Fiber: 0g
- Protein: 1g
- Cholesterol: 18mg
Keywords: Grinch Cookies Decorated, Christmas cookies, holiday cookies, easy dessert ideas, festive cookie recipe, Christmas party treats, cookie swap recipe, fun holiday baking
